Integration through the Google Cloud Console
Overview
To monitor Google Cloud Platform (GCP) resources in Motadata ObserveOps, you need to retrieve the following credentials from the Google Cloud Console:
- Client ID
- Client Secret
You also need to enable the specific GCP service APIs you want to monitor. This guide walks you through each step.
Save the Client Secret immediately after creating the OAuth client, Google will not display it again after you close the dialog. You can also download the JSON file once the Client Secret is created.
Prerequisites
- You have access to a Google Cloud project with sufficient permissions to create OAuth credentials and enable APIs.
- The service you want to monitor must be reachable from the ObserveOps server.
- The GCP OAuth application must be moved from Test to Production for continuous monitoring.
When you create a GCP OAuth application for the first time, it runs in Testing mode by default. In this mode, the Client ID, Client Secret, and Refresh Token expire every seven days. To monitor GCP services without interruption, move the application to Production for continous monitoring. Follow the GCP Test to Production Environment Setup section bellow for doing so.
⚠️ GCP Test to Production Environment Setup
Publish the App to Production
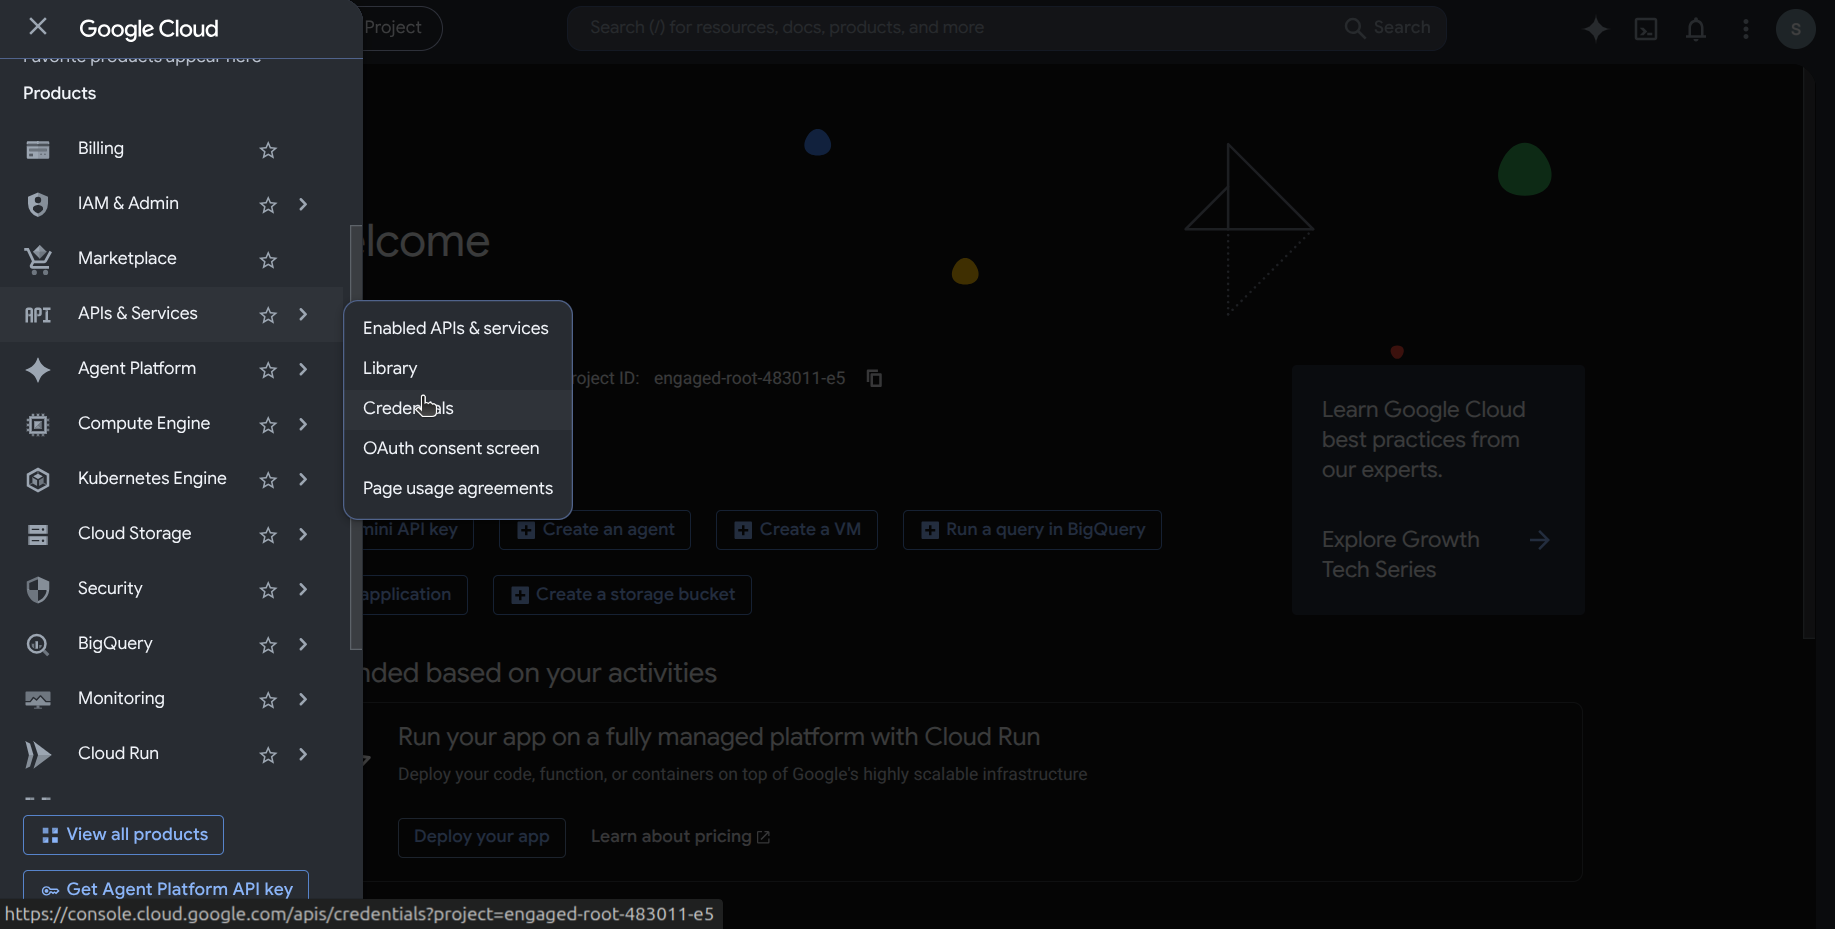
- Open the Navigation Menu, go to APIs & Services, and select Credentials.
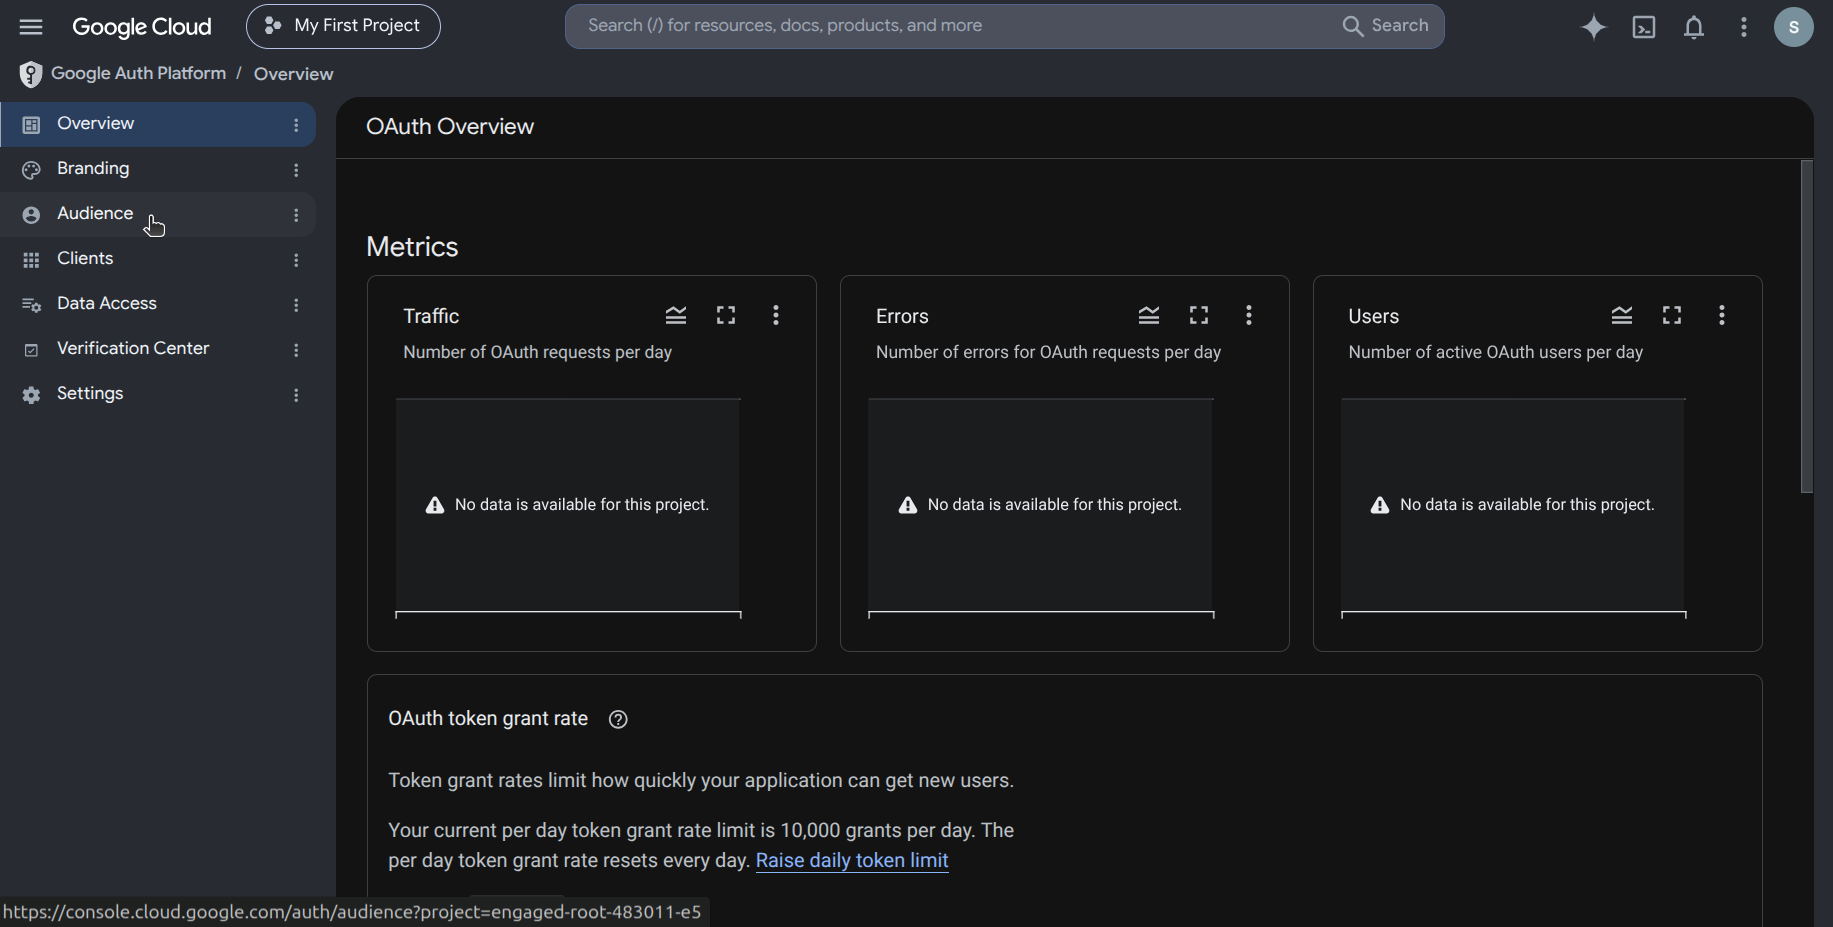
- In the left-side panel under Google Auth Platform, click Audience.
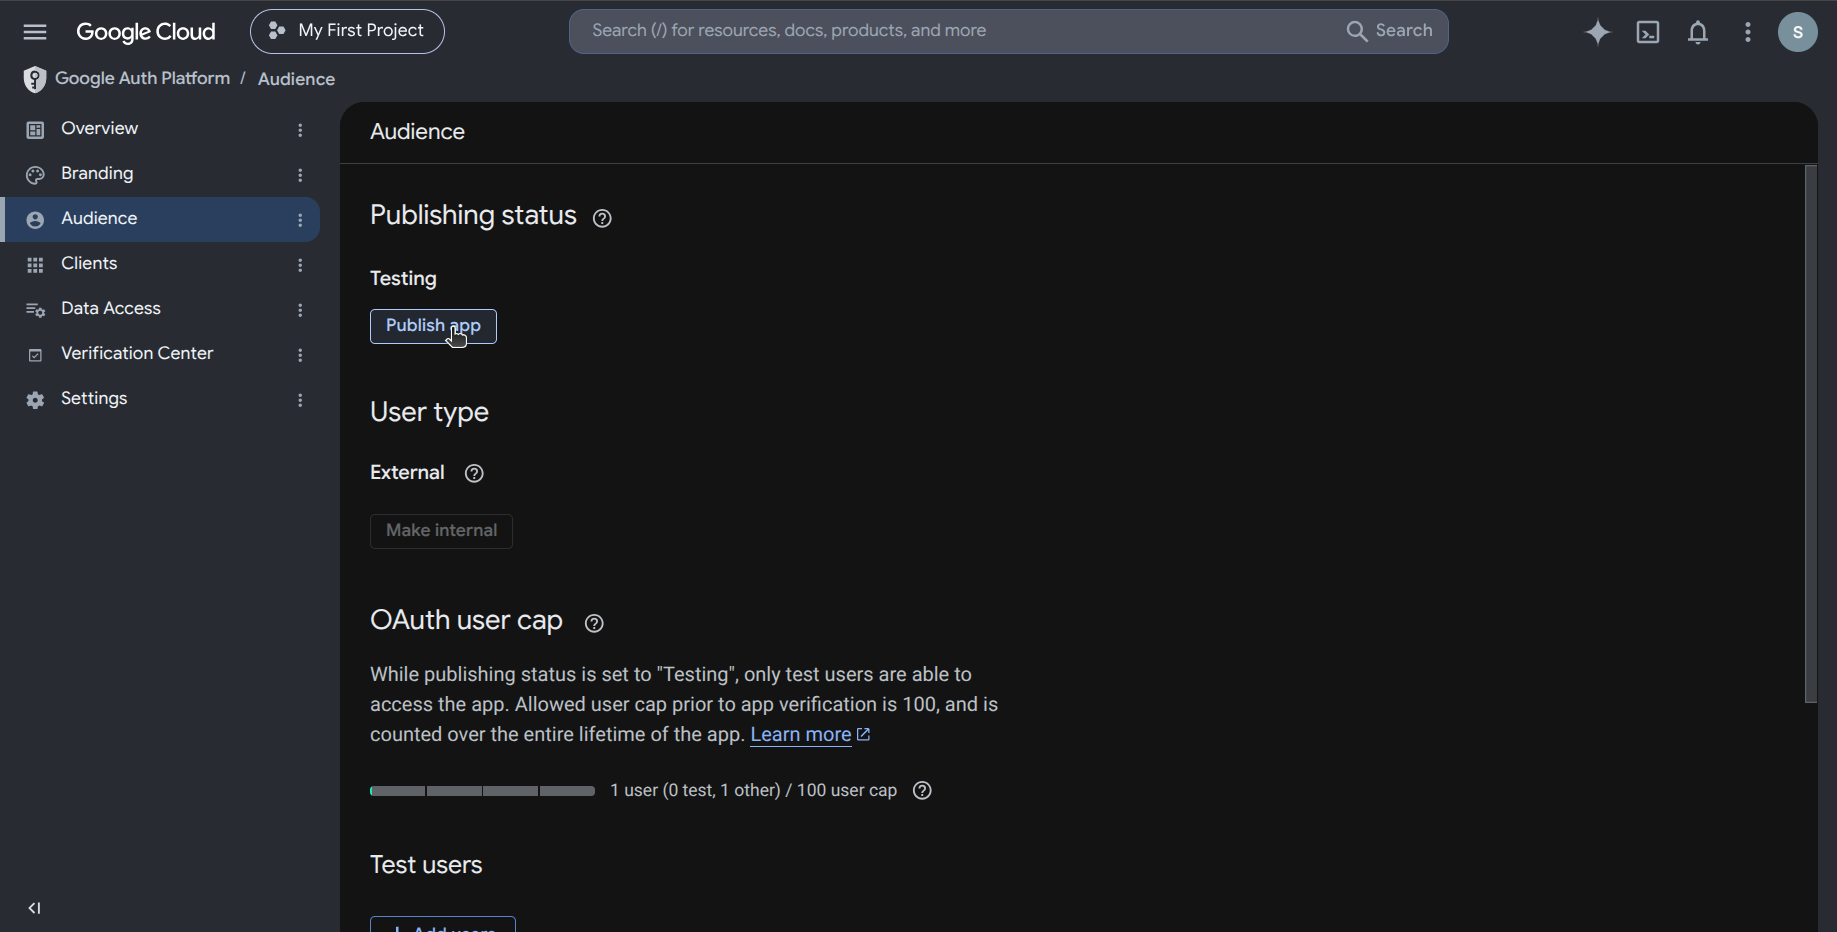
- Under Publishing status, the app shows Testing. Click Publish app.
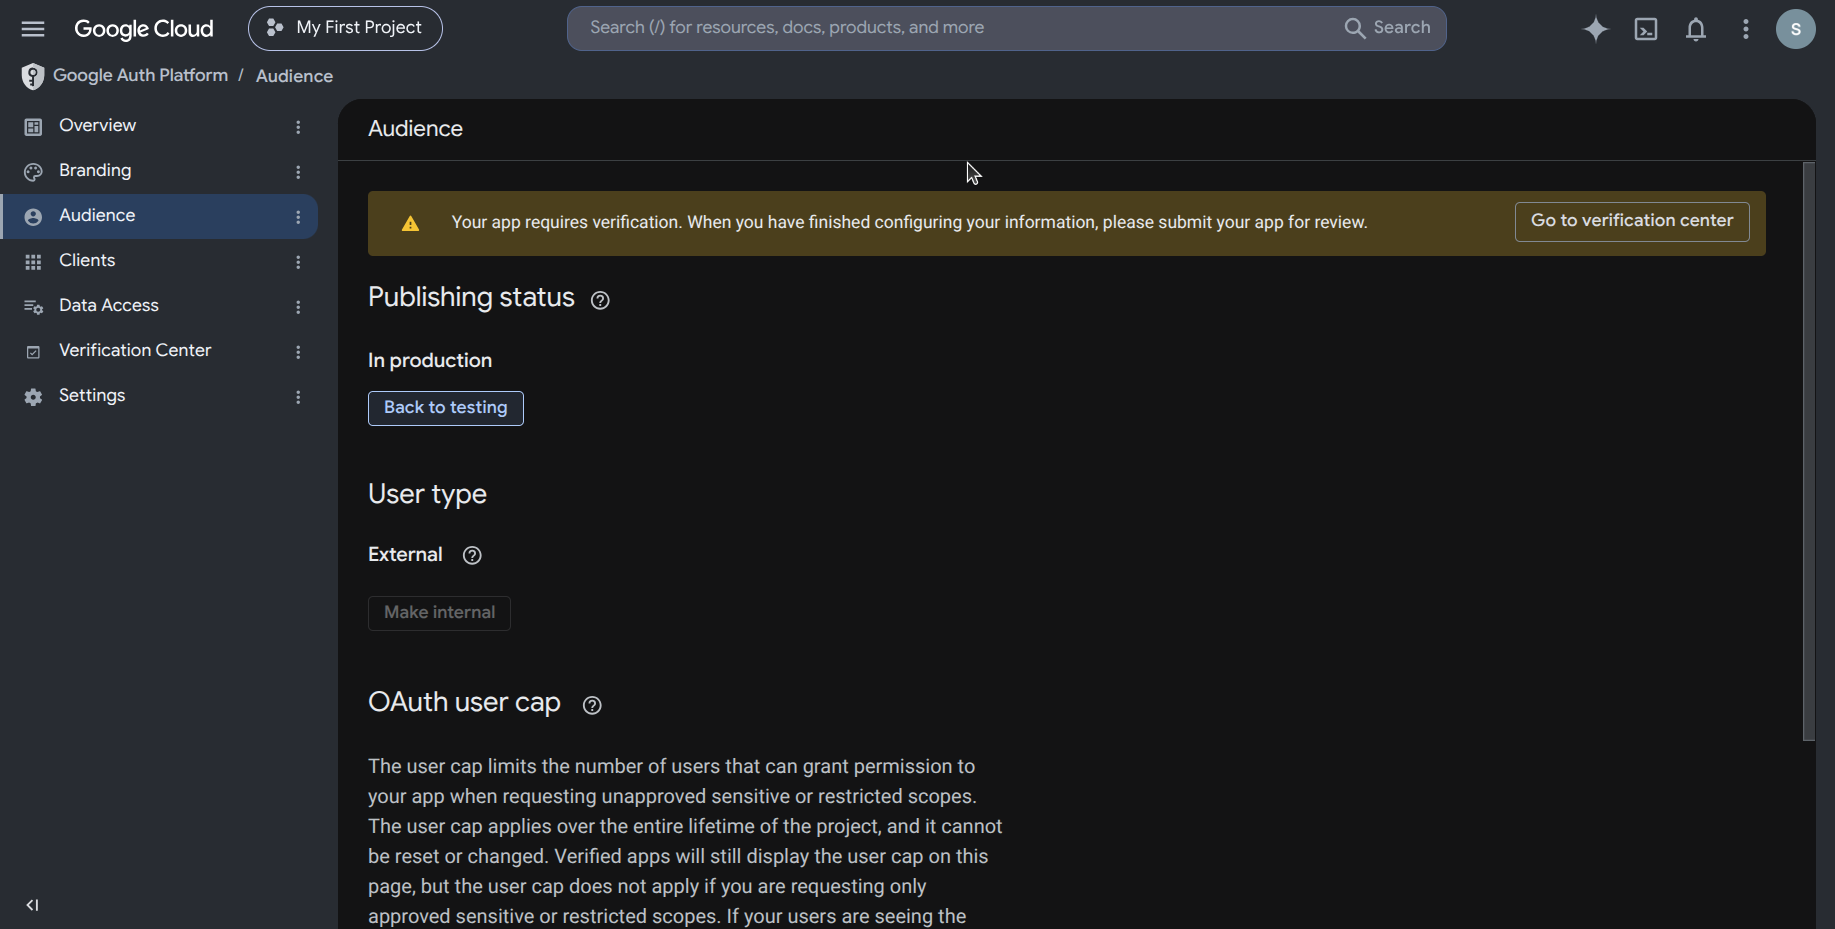
- First confirm the displayed prompt. The publishing status changes to In production. Google displays a banner asking you to submit the app for verification.
Complete Branding Verification
- In the left-side panel, click Verification Center.
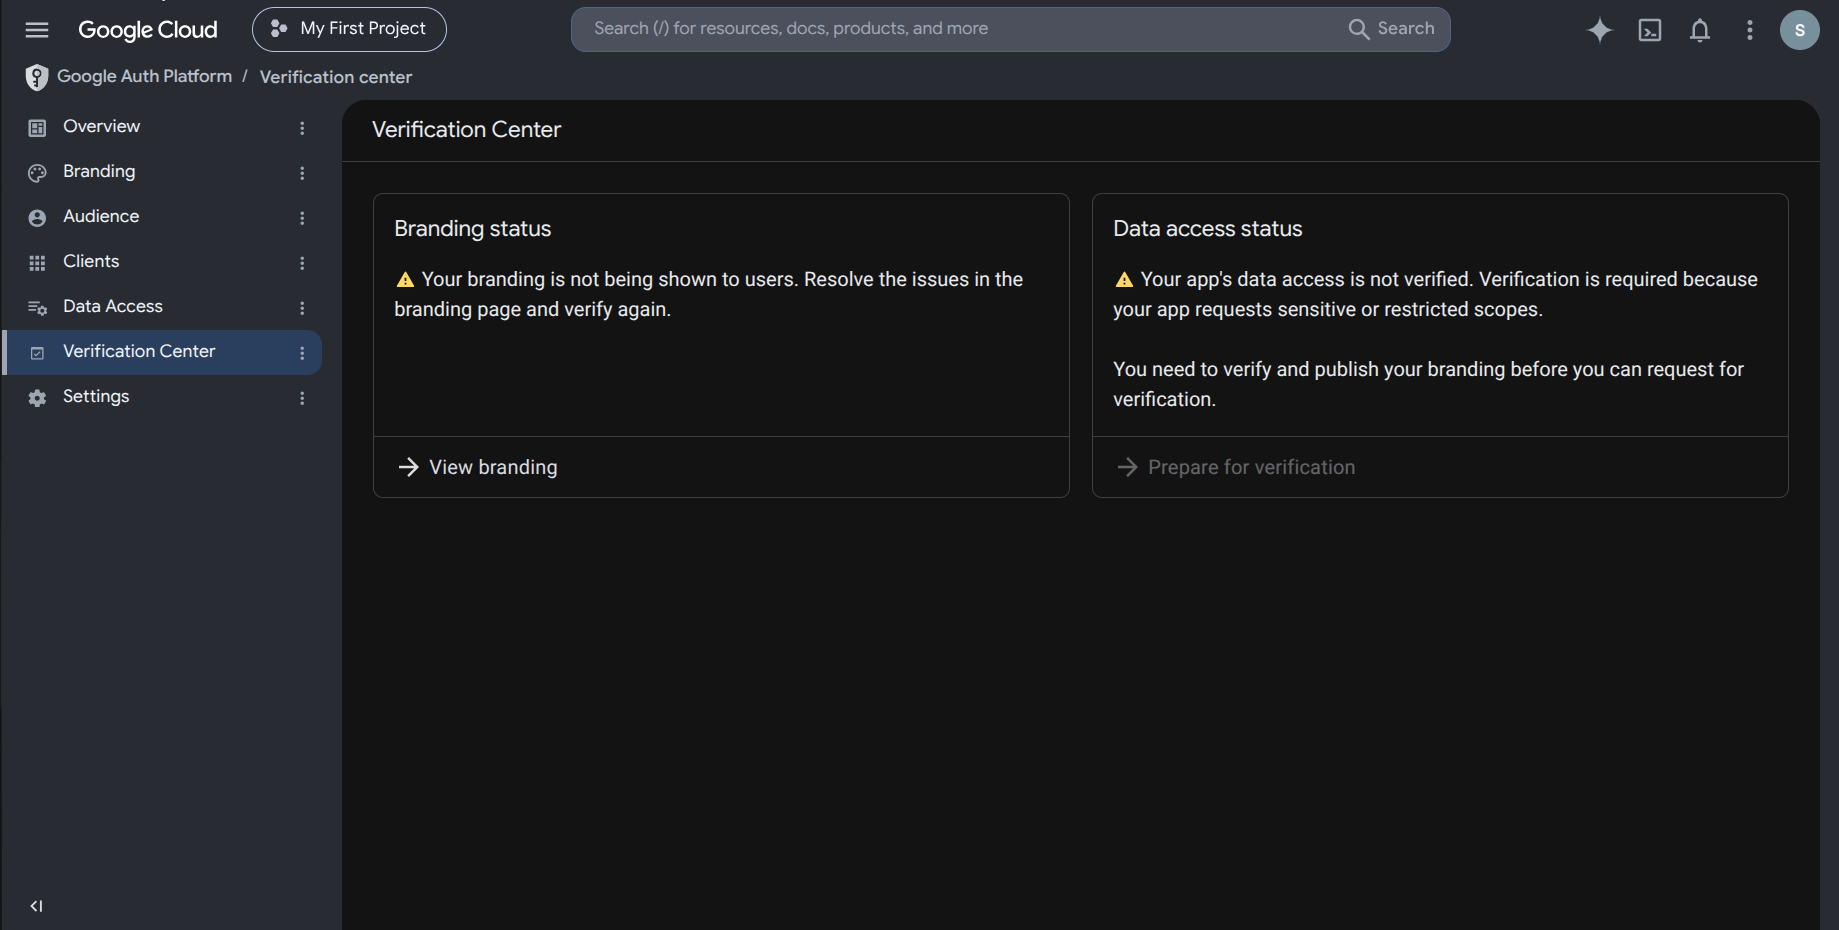
Click View branding to open the Branding page.
Fill in the App information section: App Name and User Support Email.
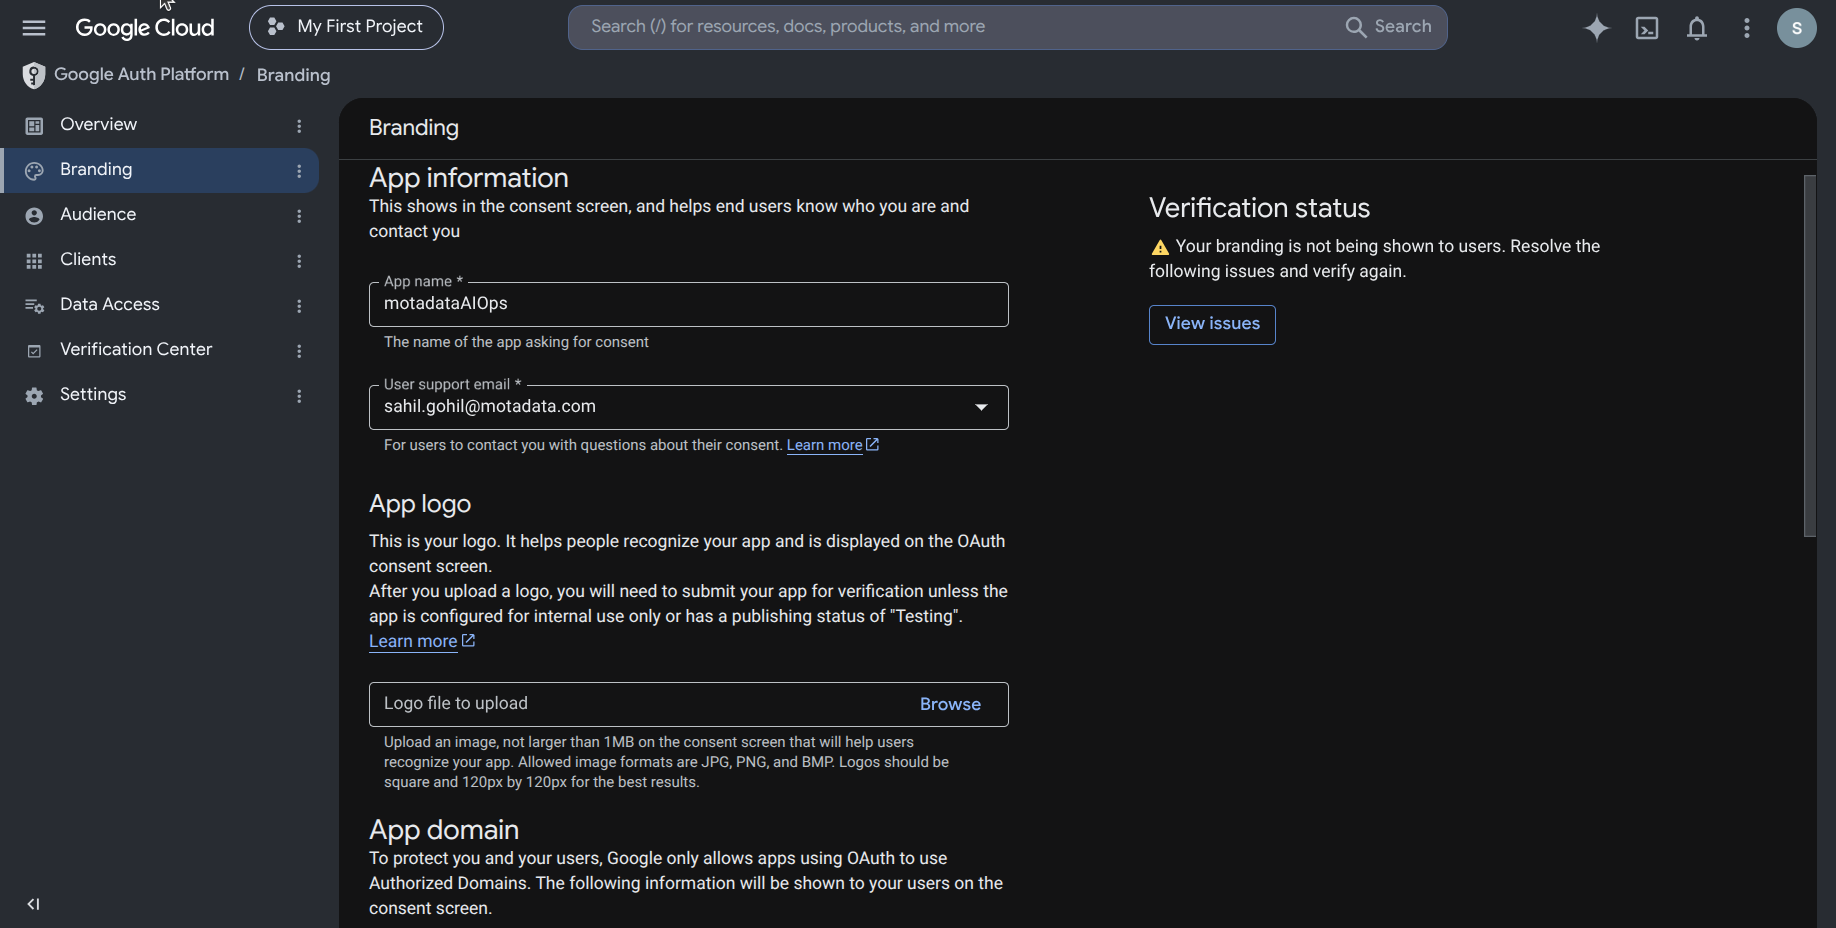
- Fill in the App domain section: provide your Application home page, Privacy Policy link, and Terms of Service link.
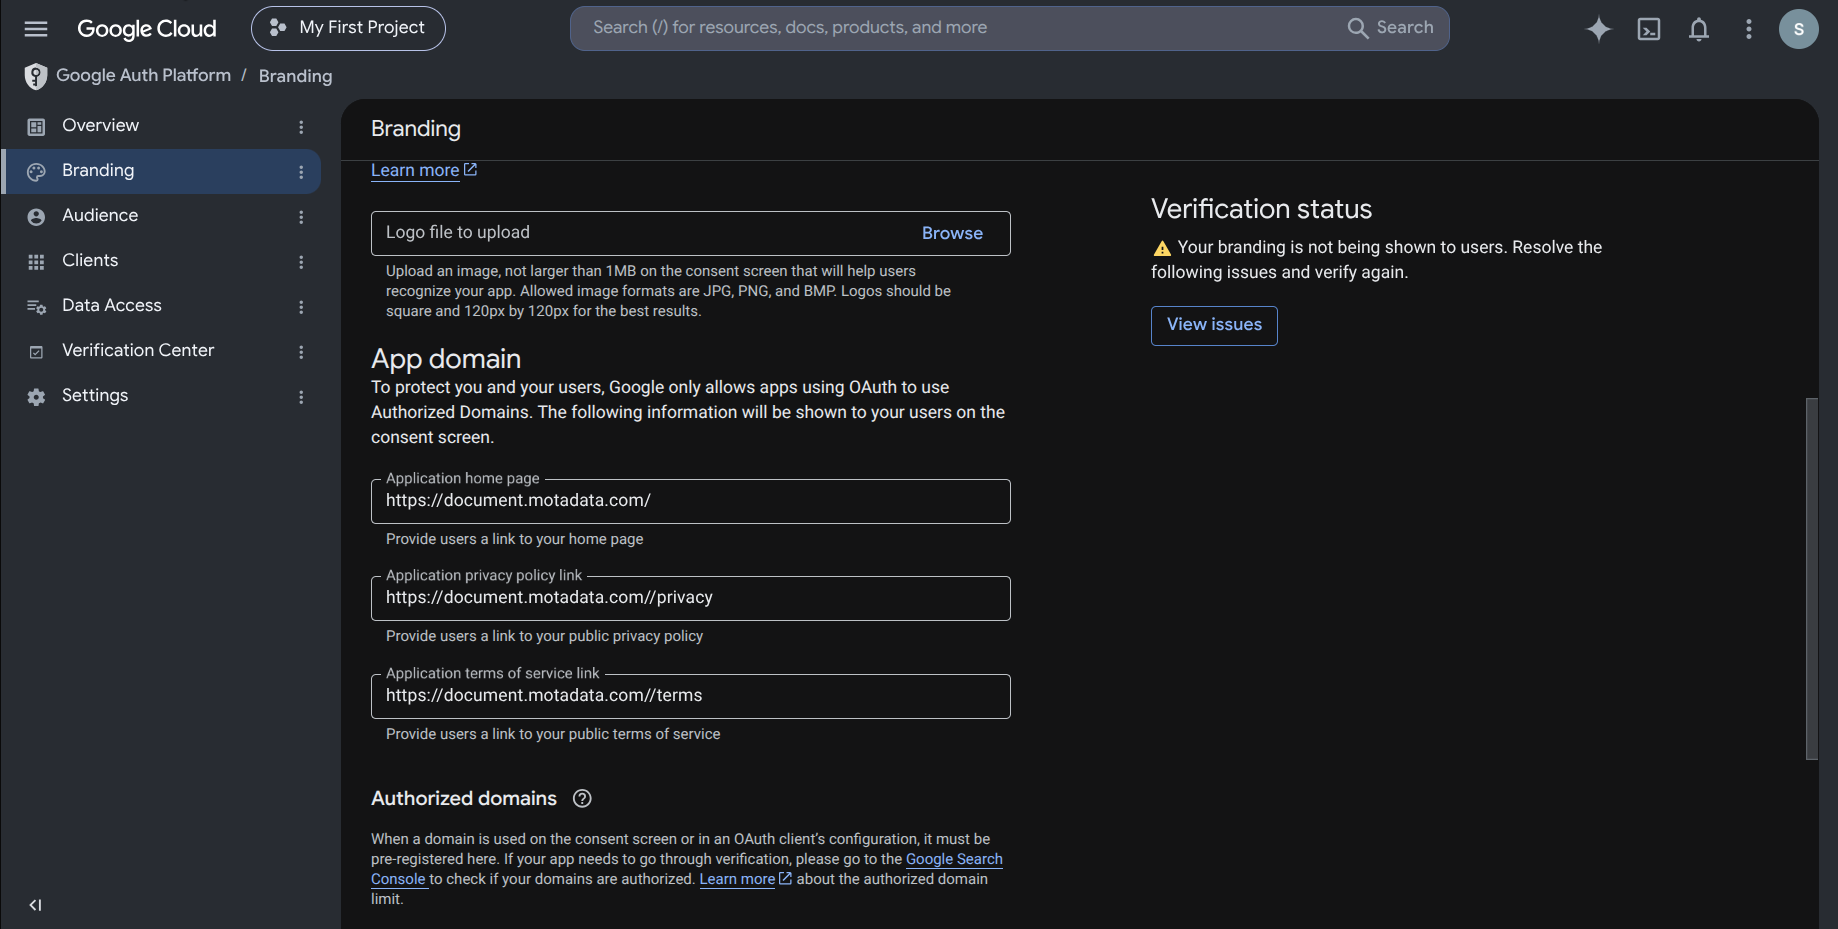
- Under Authorized domains, add your domain (for example,
motadata.com). Add your developer contact email address, then click Save.
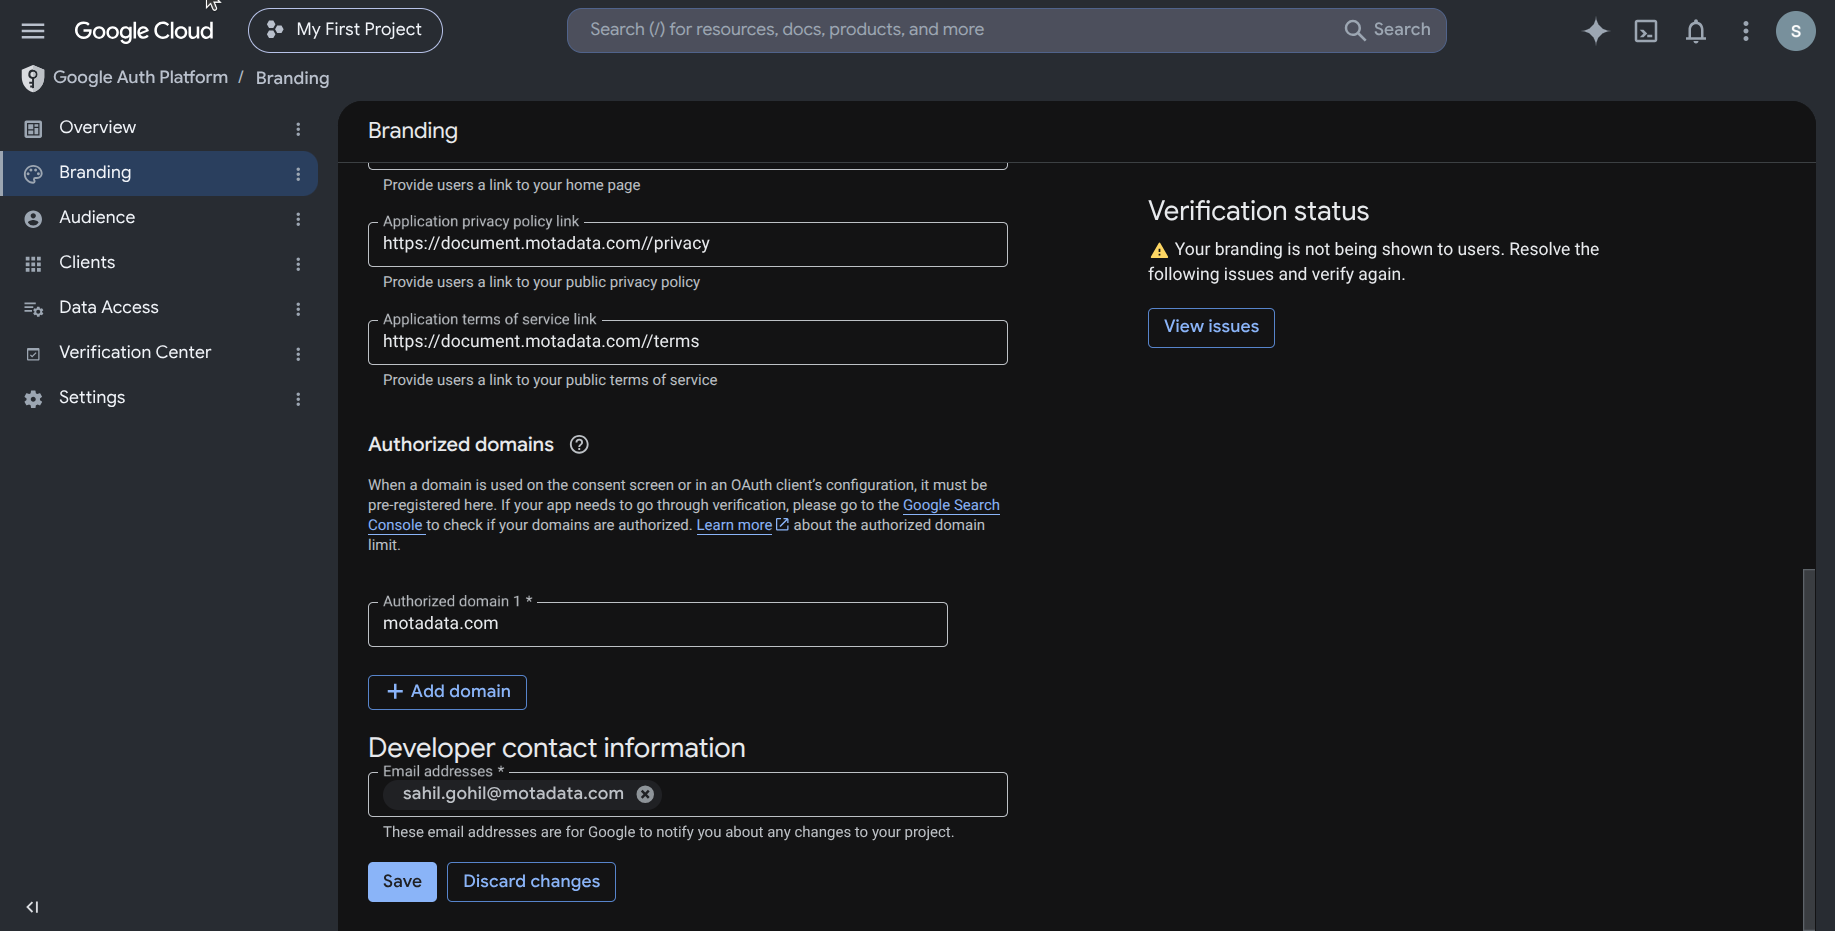
The app name and the authorized domain must match. For example, if the domain is motadata.com, the app name must be motadata. Your application URL must also be publicly accessible otherwise Google rejects verification requests for URLs that are not publicly reachable.
- Return to Verification Center and submit for branding verification. Google reviews your submission and sends a confirmation. This process can take up to 4 to 6 weeks.
Complete Data Access Verification
After branding verification passes, you must also verify data access for any sensitive or restricted scopes your app uses.
In the left-side panel, click Data Access.
Under Your Restricted Scopes, confirm the scopes your app requests are listed.
Under Demo video: how will the scopes be used?, paste a YouTube video URL that demonstrates how your application uses the requested scopes.
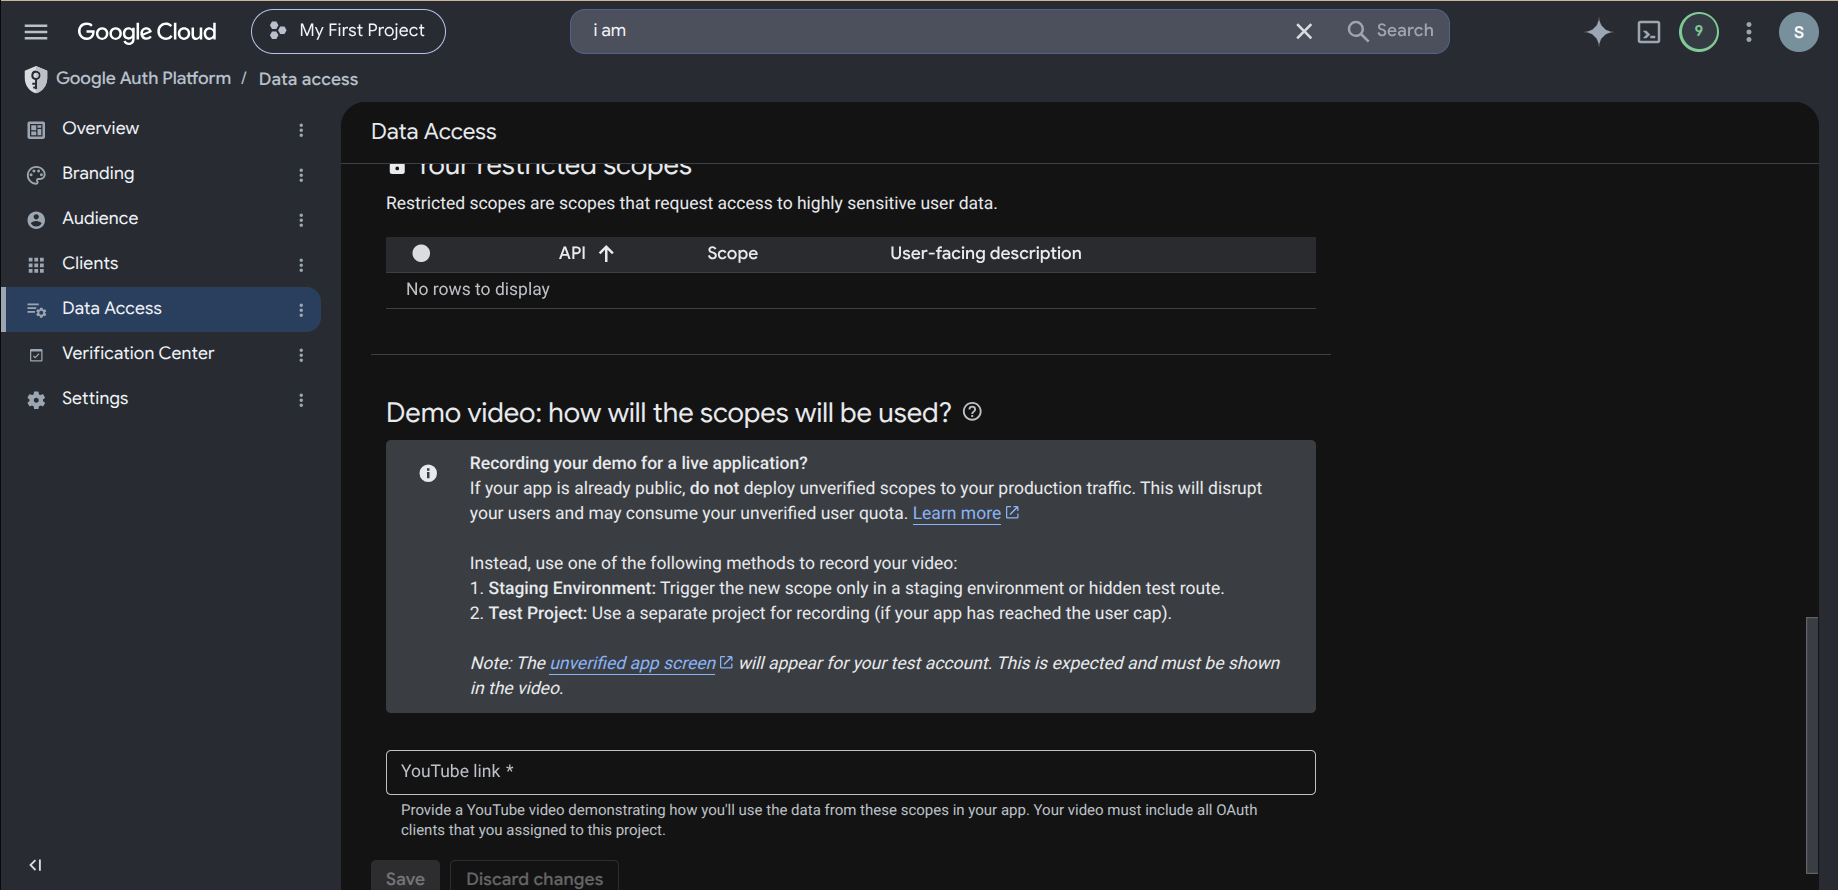
- Click Save. Google reviews the video and marks data access as verified.
Record your demo video in a staging environment or using a test project. Do not deploy unverified scopes to your production traffic. The unverified app screen will appear in your video and this is expected.
Attach a Billing Account
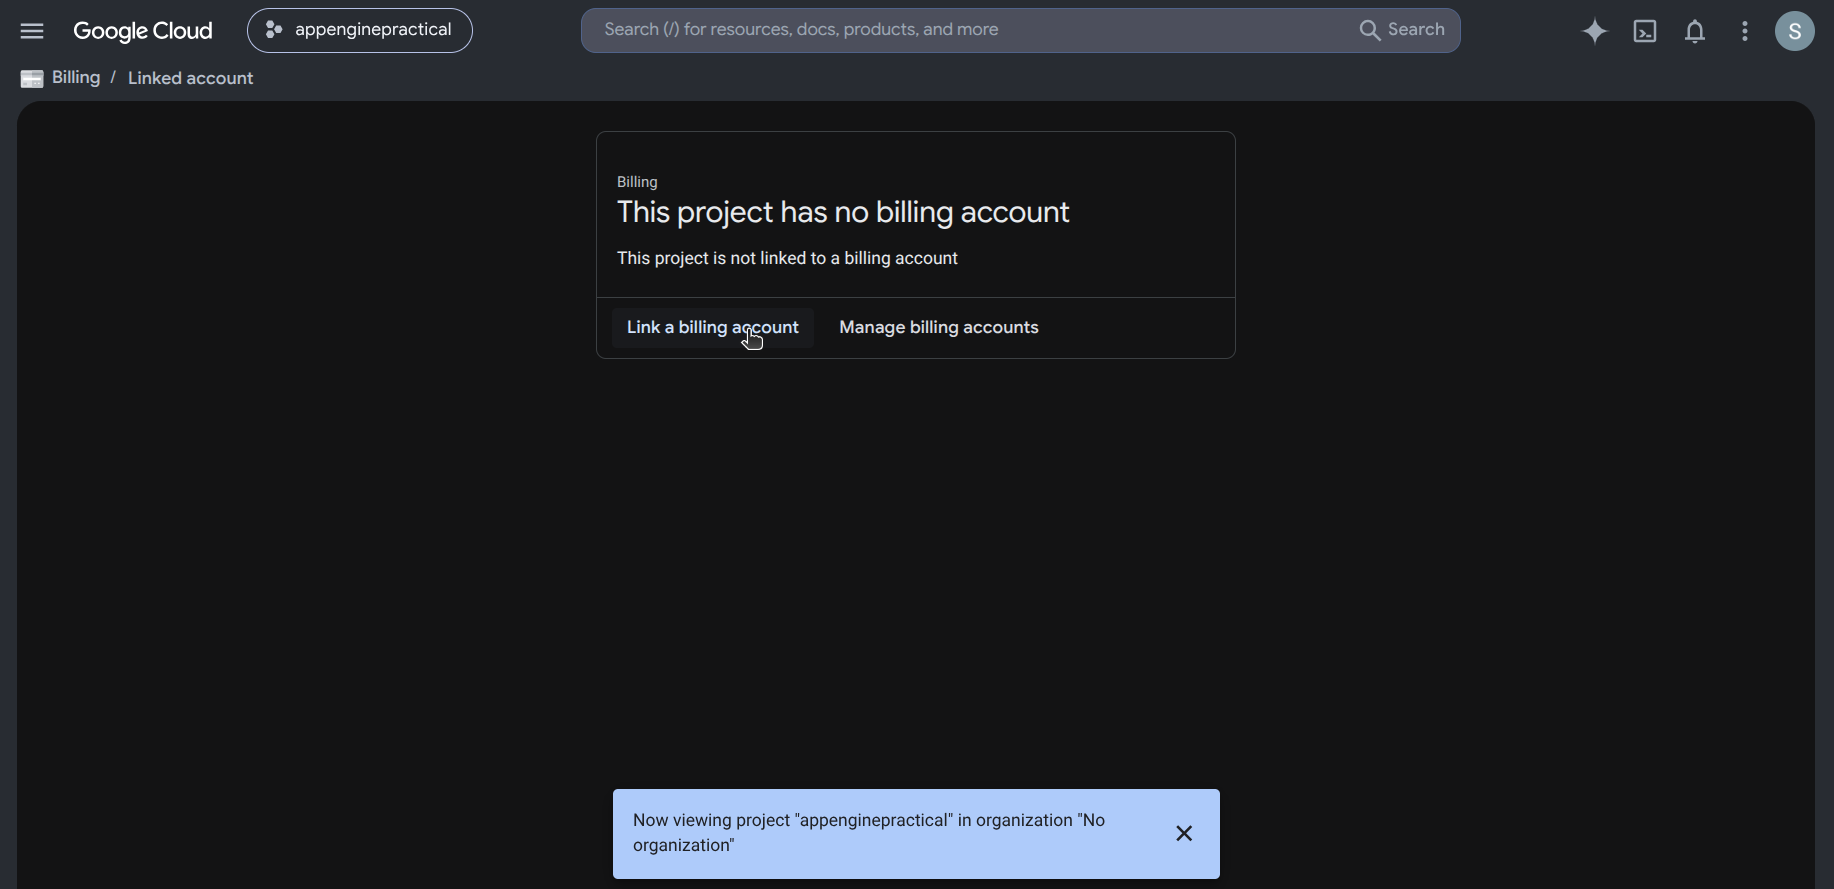
Your GCP project must have a billing account linked before production use.
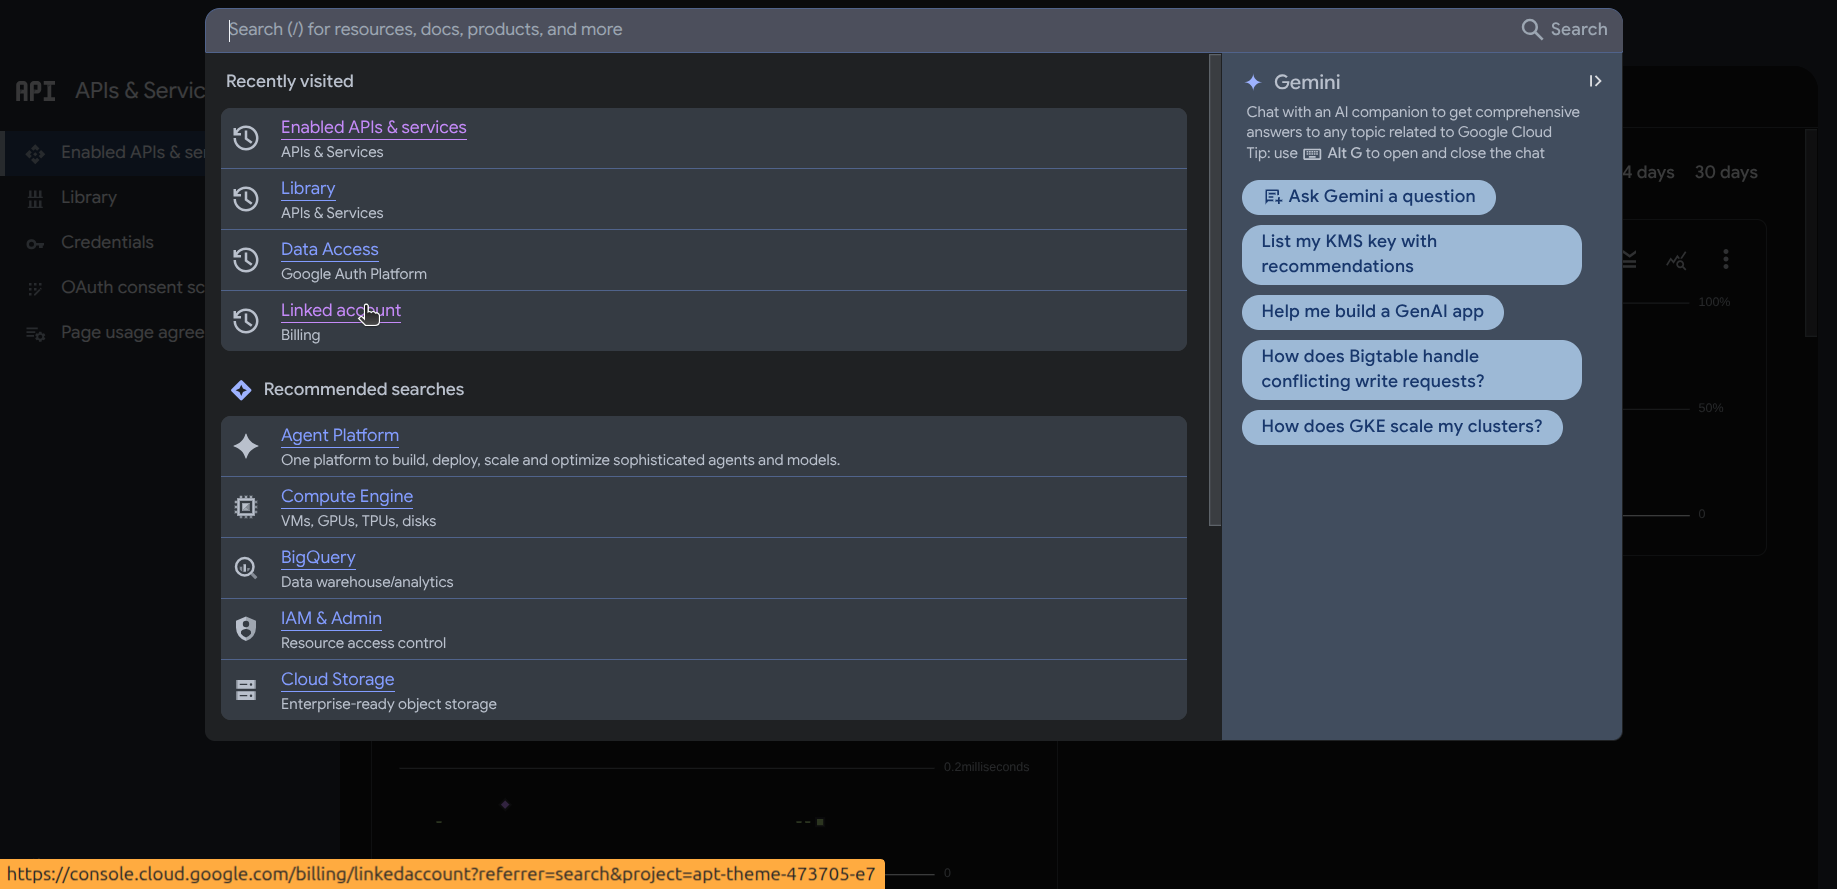
- In the search bar at the top of the Google Cloud Console, search for Linked account or navigate to Billing.
- If the project shows This project has no billing account, click Link a billing account and select or create a billing account.
Assign IAM Roles
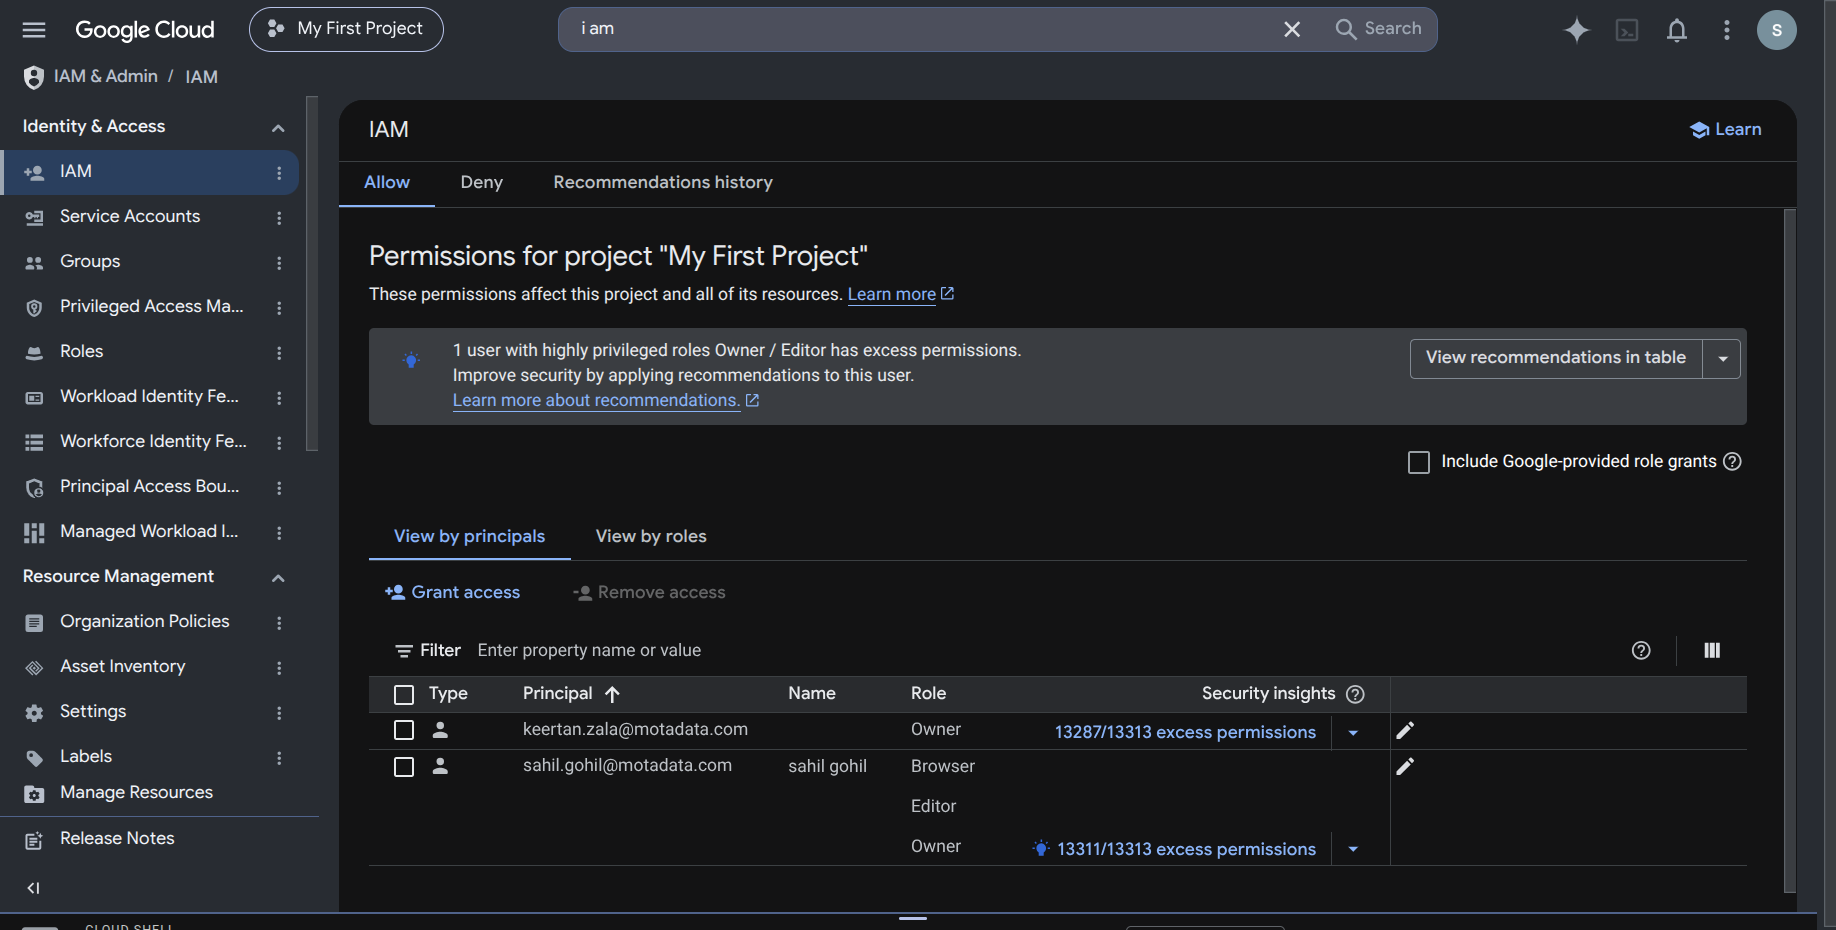
Open the Navigation Menu, go to IAM & Admin, and select IAM.
Click Grant access.
In the Add principals field, enter the email address of the user or service account.
Assign the Browser role and either the Editor or Viewer role, then click Save.
Your project must be attached to a billing account before IAM roles take effect for production API calls.
If you have already performed production setup you can start from the step 1 as below.
Step 1: Enable Consent Screen
Log in to the Google Cloud Console.
Open the Navigation Menu using the top-left hamburger icon.
Go to APIs & Services and select OAuth Consent Screen.
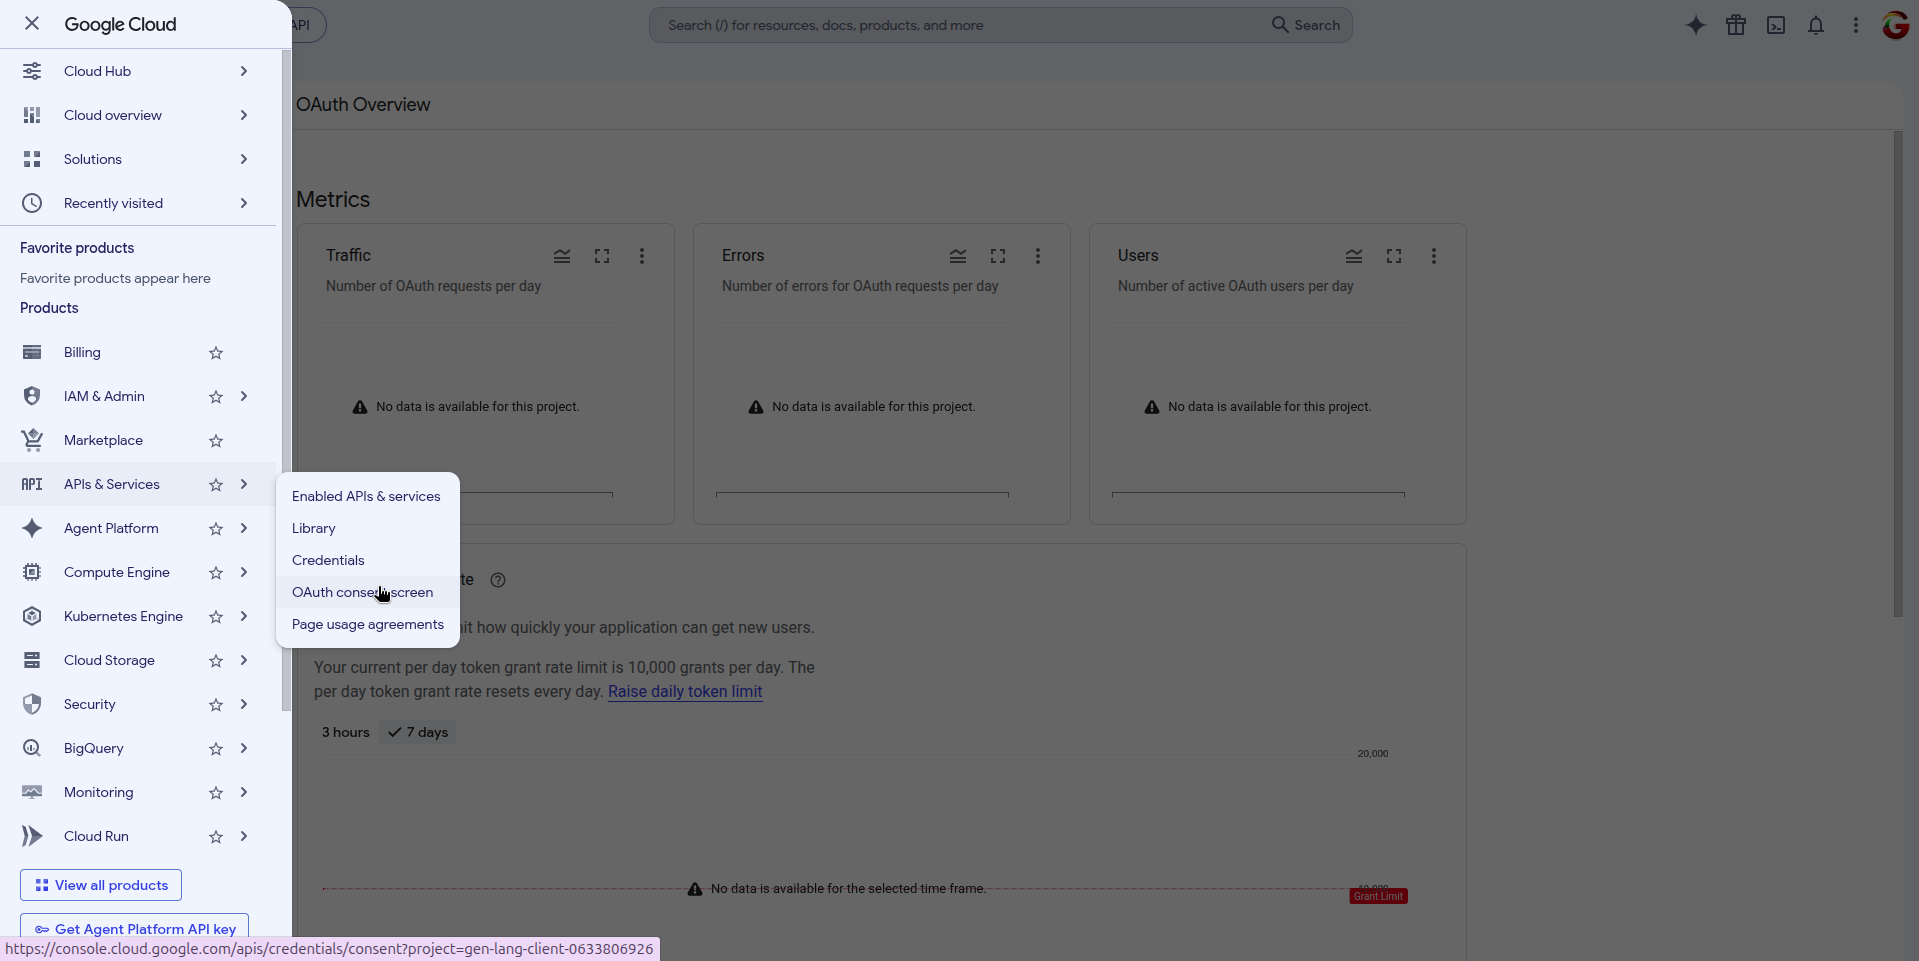
This displays the OAuth Overview page.
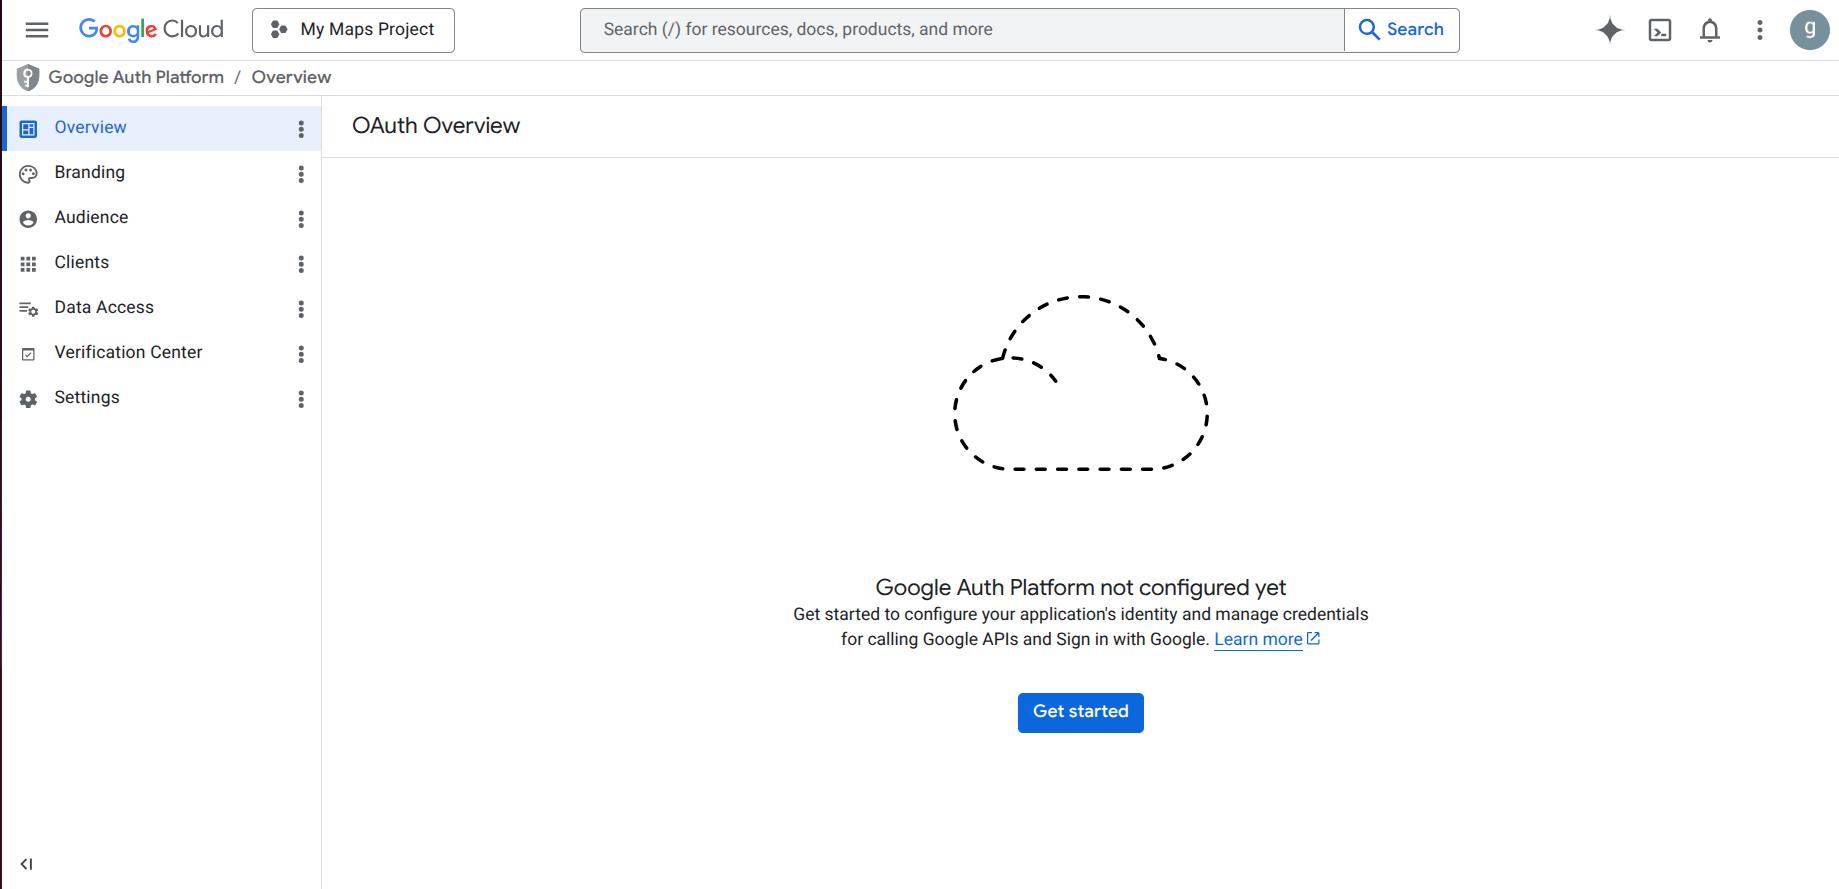
If consent is already enabled for your project, start from Step 2 after navigating to the OAuth Overview page.
Click Get Started to configure the consent screen.
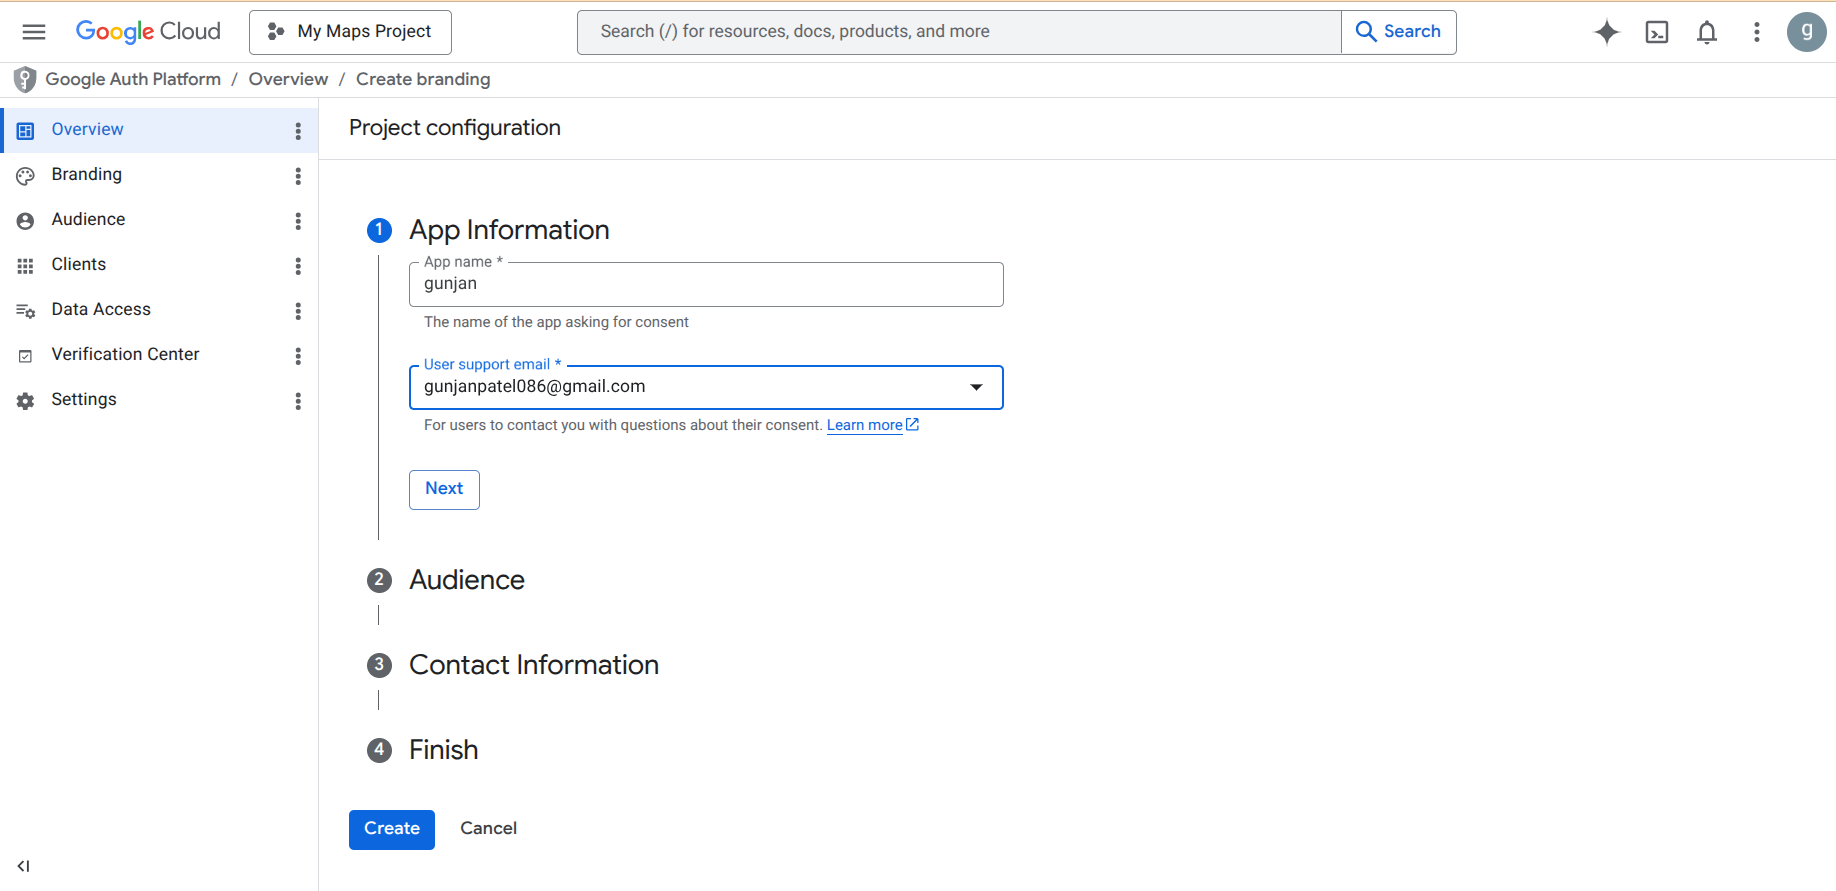
Under the App Information section, enter the App Name for which you are asking for consent and the User Support Email where users can contact you with questions about this consent then click Next.
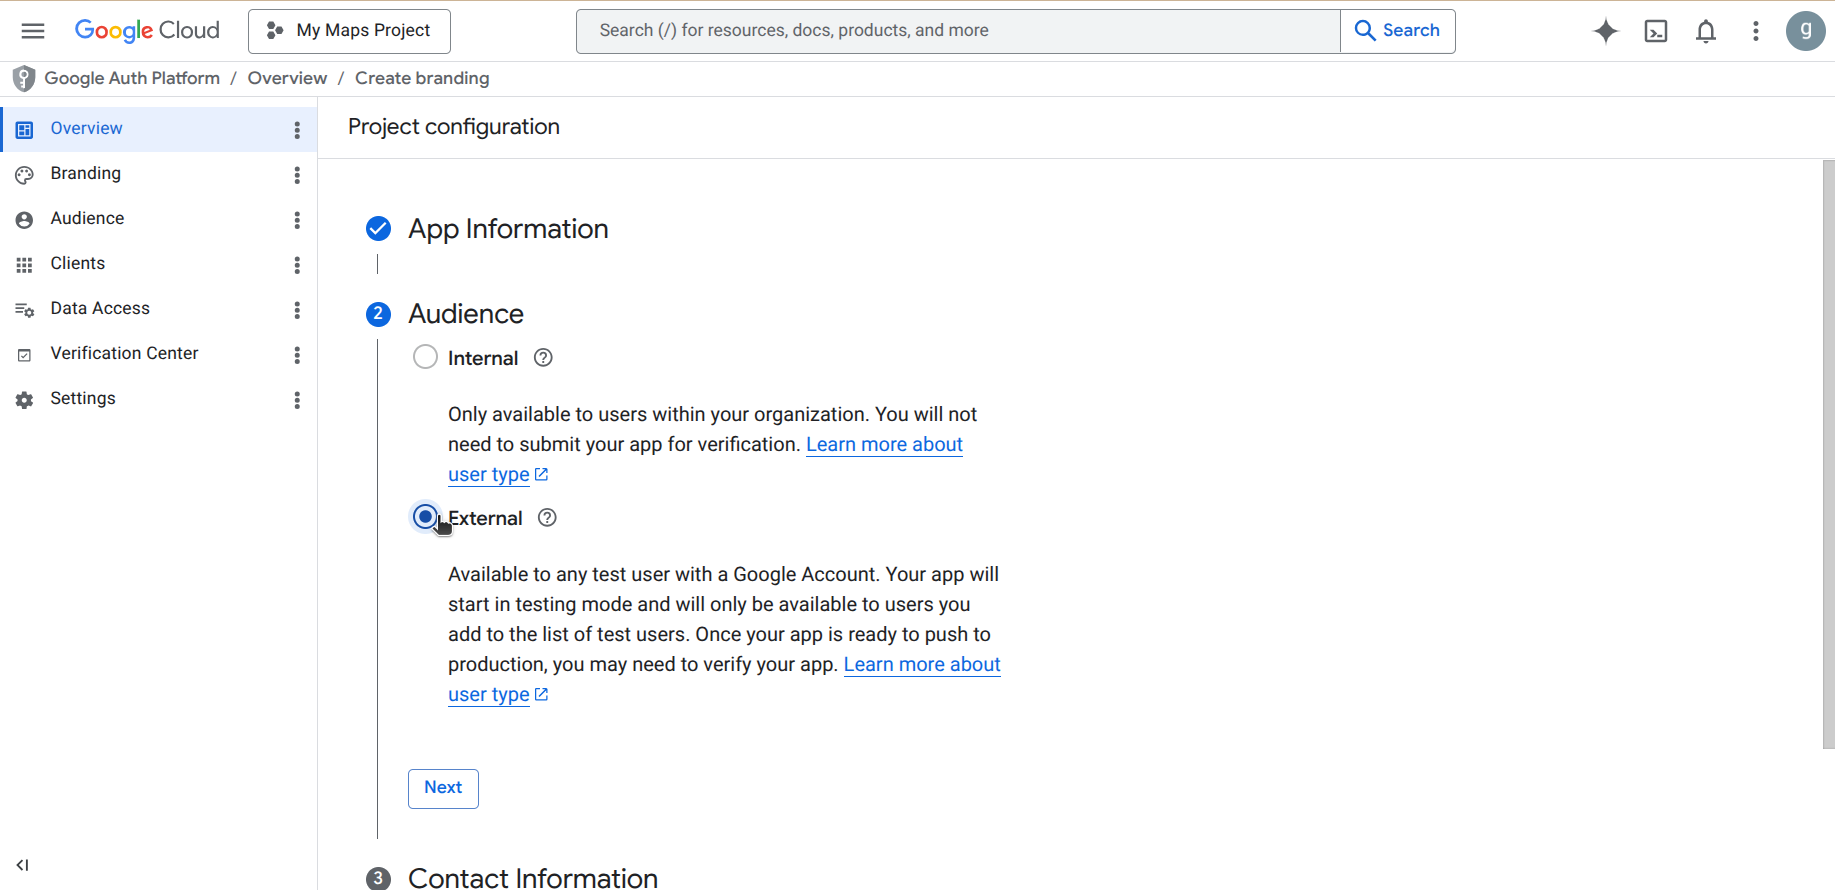
- Select External option from the Audience list and click Next.
- Provide the Email Address to which Google will send notifications about any changes to your project and click Next.
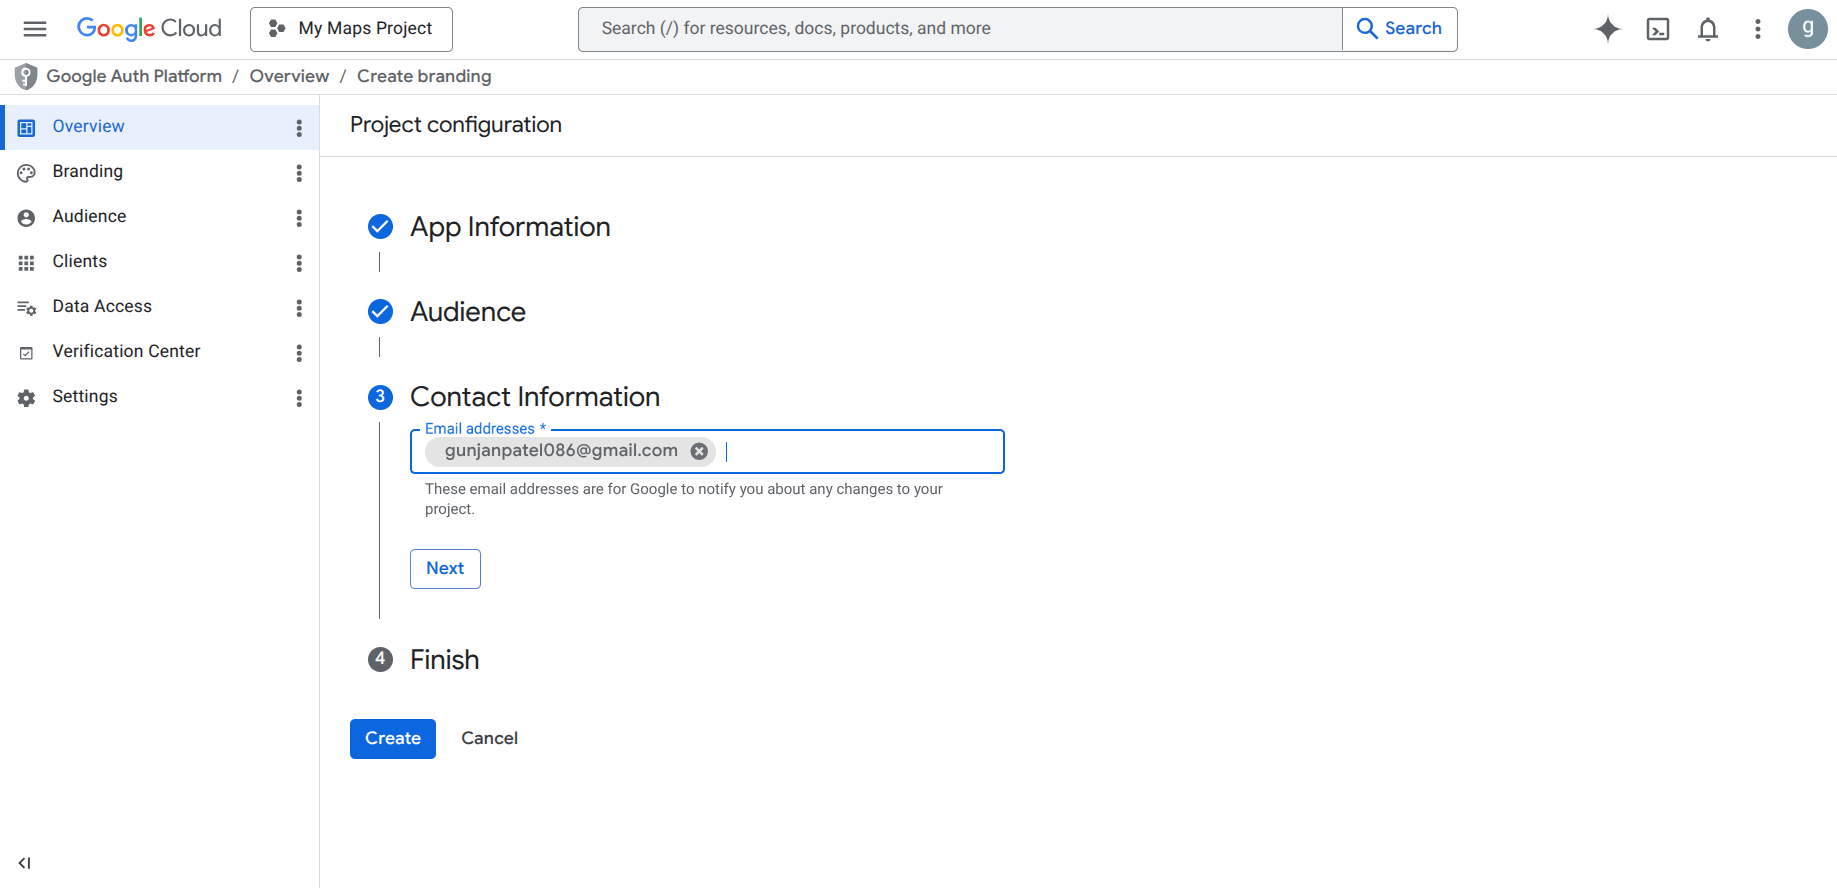
Click Finish to complete the steps.
Click Create to enable the consent screen.
Step 2: Add Test User
In the left-side panel under Google Auth Platform, click Audience.
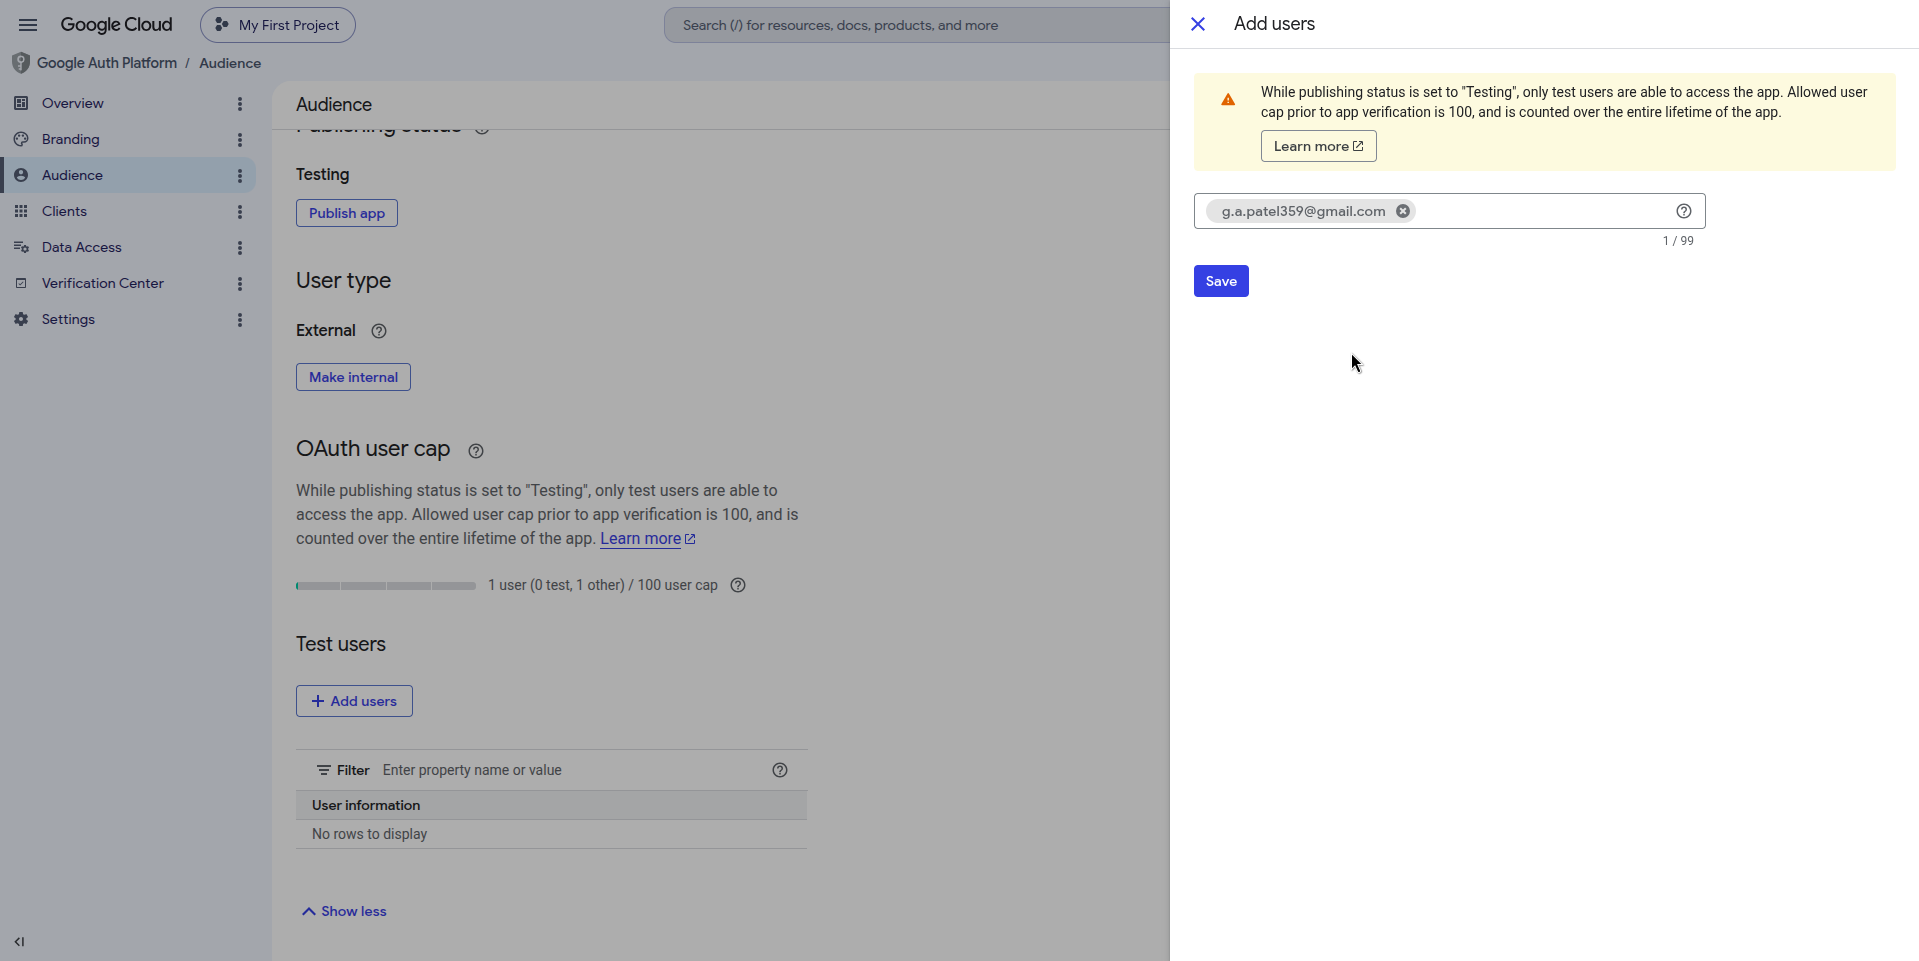
Under the Test Users section, click Add Users.
Enter the email addresses to use for testing.
Step 3: Configure Data Access Scopes
In the left-side panel under Google Auth Platform, select Data Access.
Review the listed scopes. The following scopes are required for ObserveOps to collect GCP monitoring data:
| Scope | Purpose |
|---|---|
../auth/cloud-platform | Full access to Google Cloud services |
../auth/cloudplatformprojects.readonly | View Cloud Platform projects |
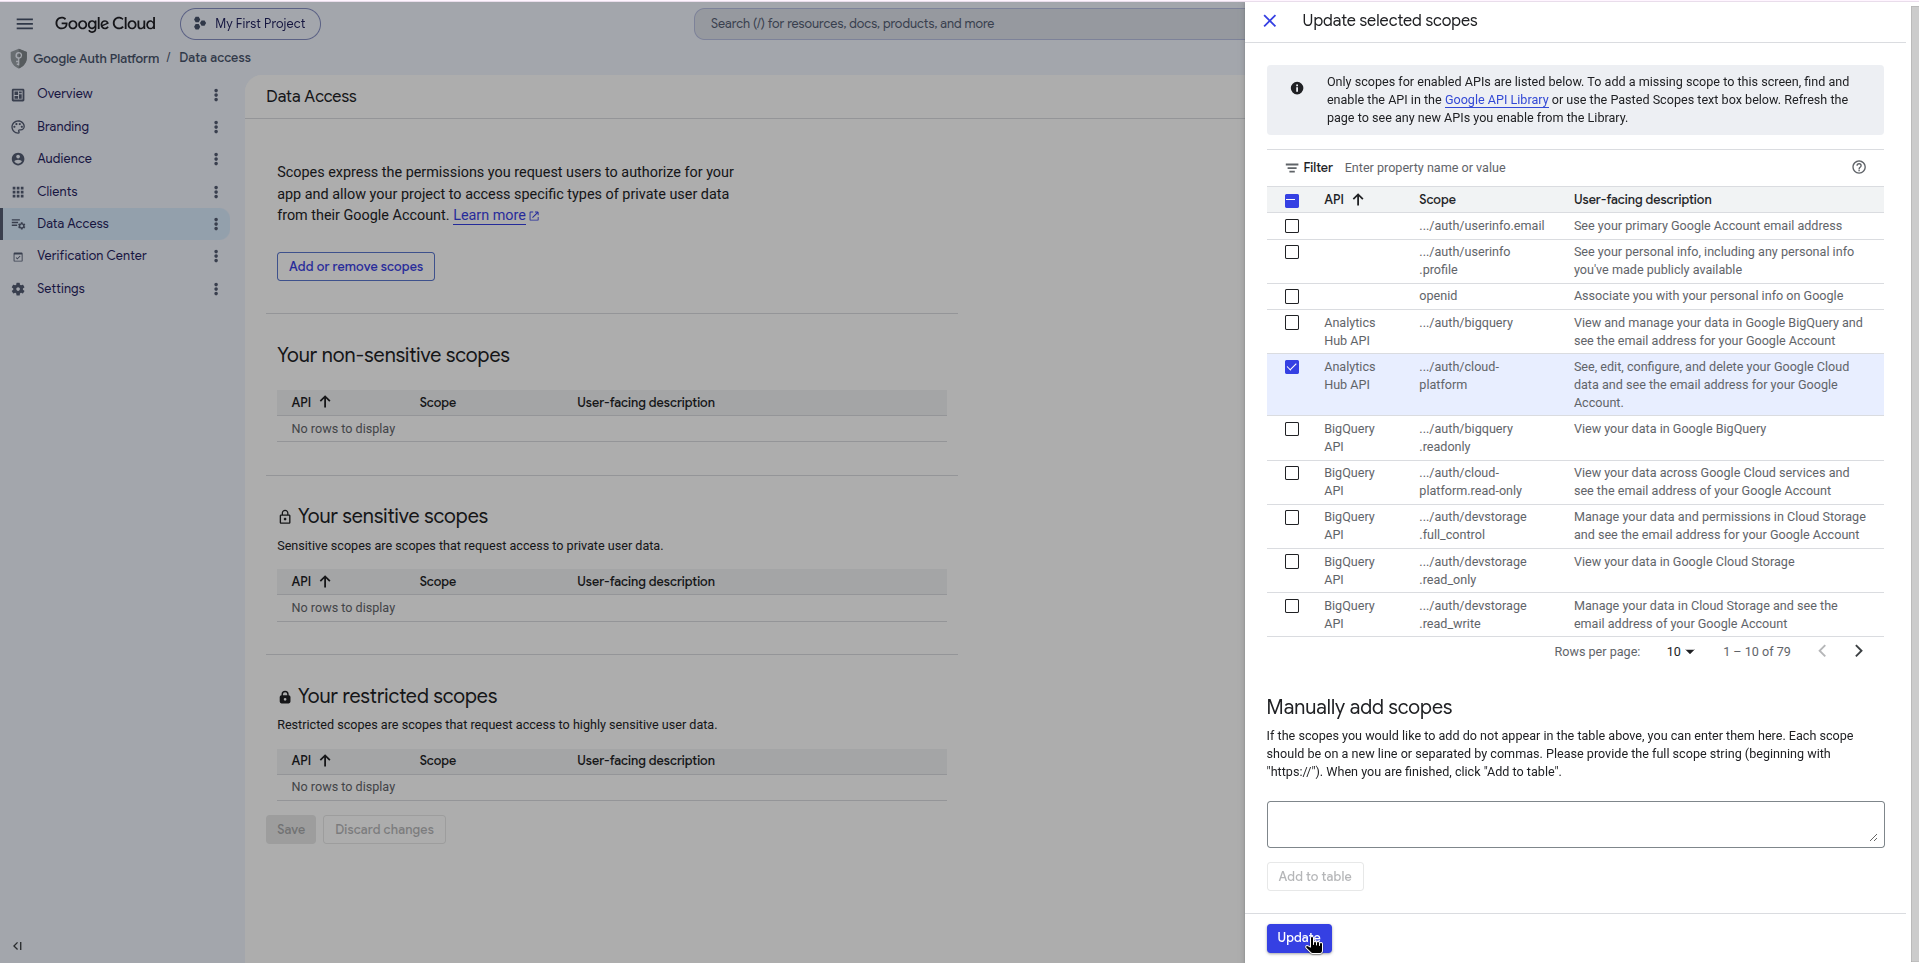
- Click Add or remove scopes if any required scope is missing, and add it.
Step 4: Create an OAuth Client ID
Open the Navigation Menu using the top-left hamburger icon.
Go to APIs & Services and select Credentials.
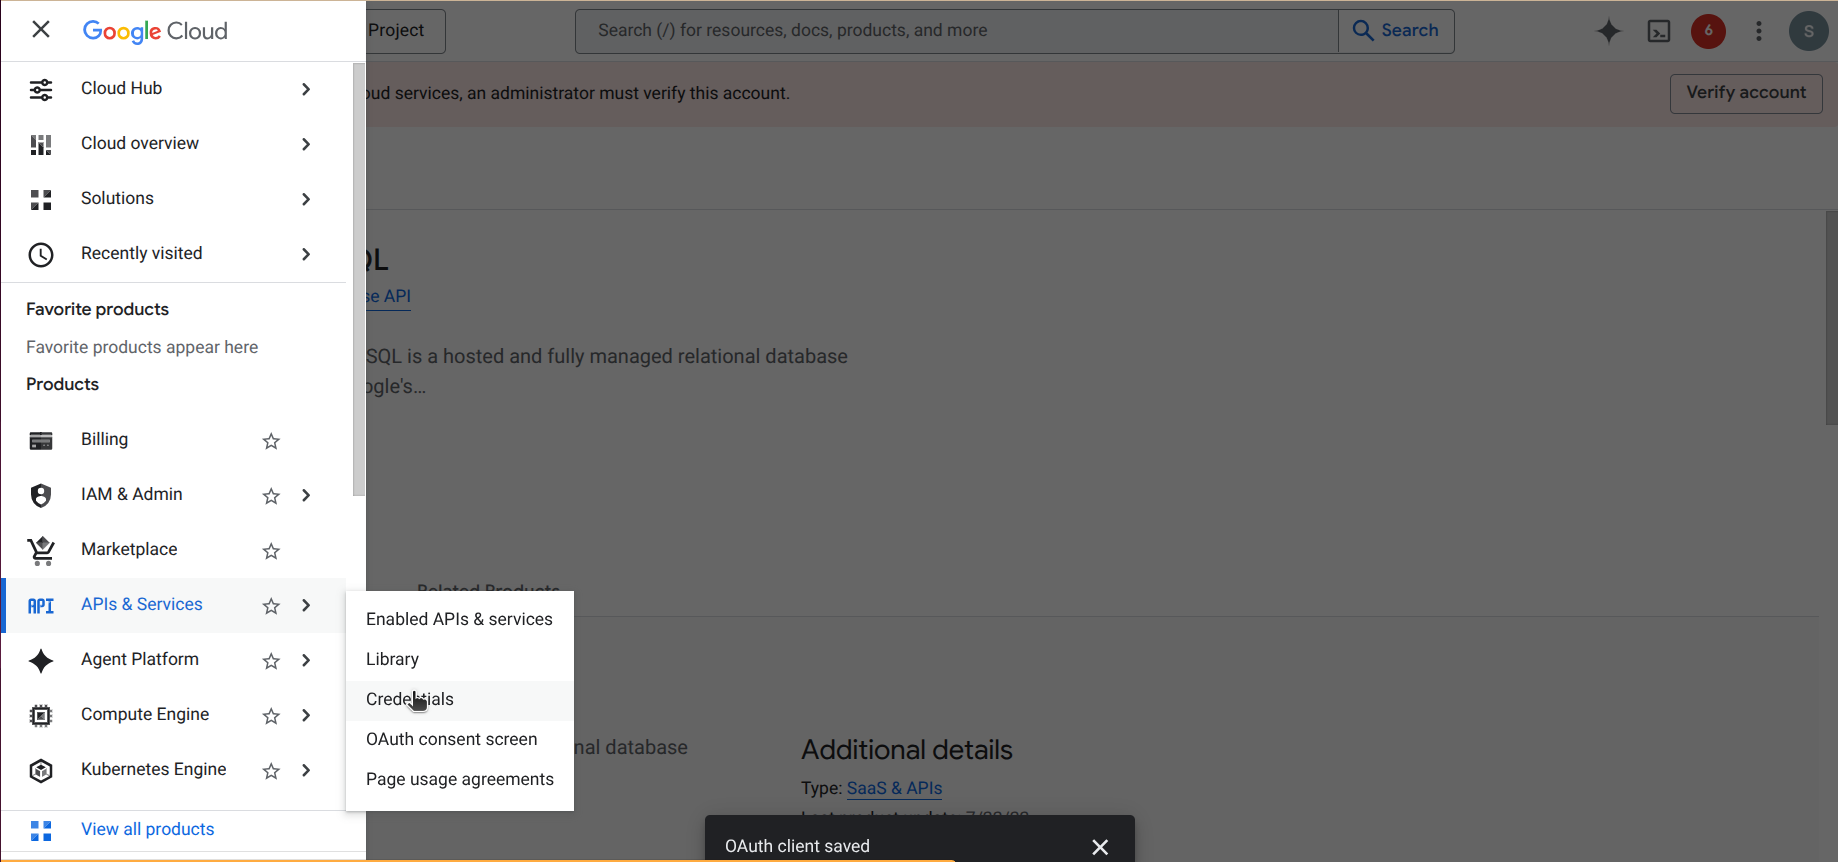
On the Credentials page, click + Create credentials in the top bar. From the list, select OAuth client ID.
In the Create OAuth client ID form, set Application type to Web application.
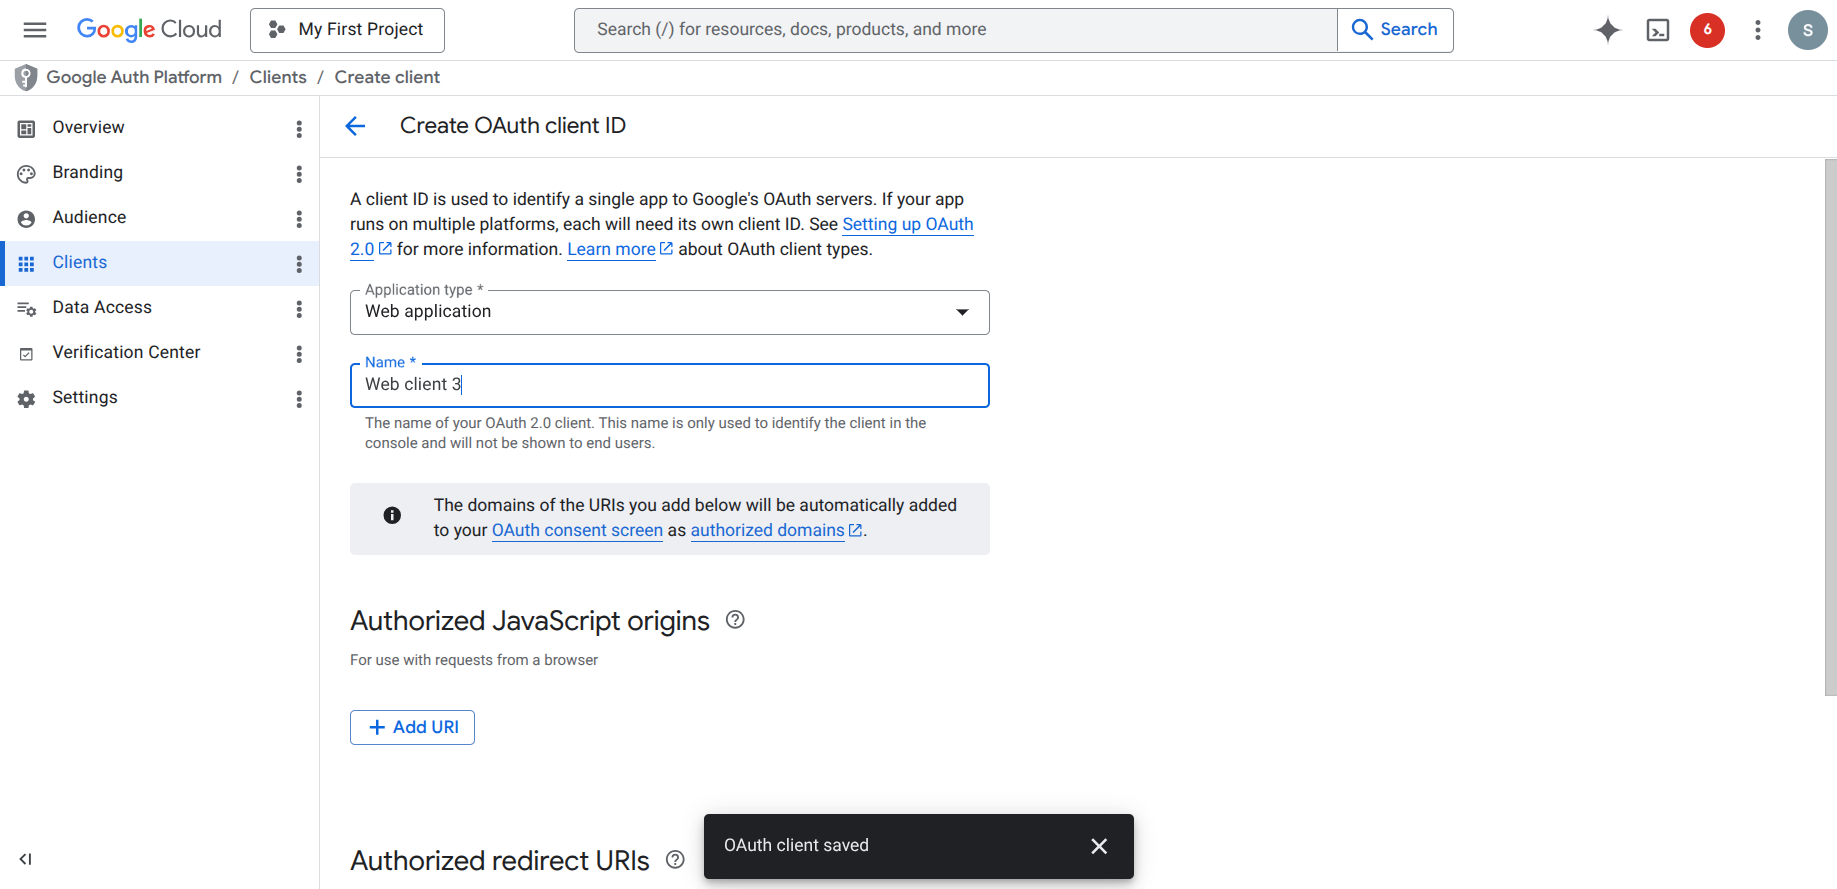
Give the client a name.
In the Authorized JavaScript origins section, provide the URL of your ObserveOps application domain, for example
{Motadata_Application_Domain}.
Provide the domain only. An IP address will not work here.
- In the Authorized redirect URIs section, provide the Redirect URL you copied while creating the credential profile in ObserveOps. Click Create.
Google displays the OAuth client created dialog with your Client ID and Client Secret.
Copy and securely save both values before closing this dialog. The Client Secret cannot be retrieved again without it, syncing GCP data with ObserveOps is not possible.
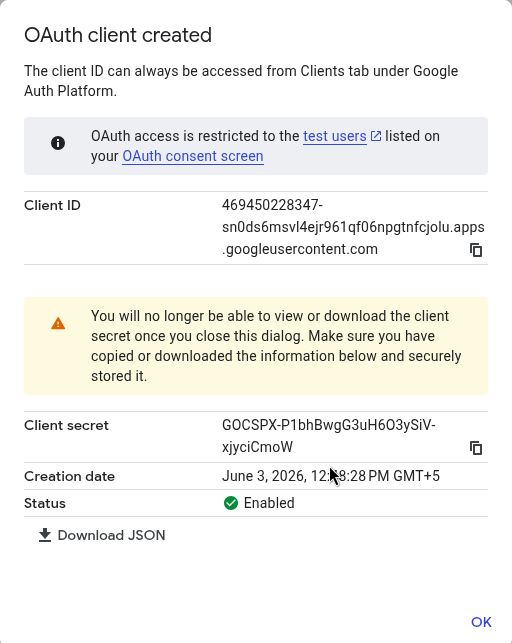
- Click OK to close the dialog.
Step 5: Enable Required GCP Service APIs
ObserveOps can only collect metrics for GCP services whose APIs are enabled in your project. Enable each service API before ObserveOps can discover and monitor it.
Your application URL must be publicly accessible before you submit for branding verification. Google validates the authorized domain during the verification review. If the URL is not publicly reachable, Google rejects the verification request and you must resubmit after making it accessible.
- Open the Navigation Menu, go to APIs & Services, and select Enabled APIs & services.
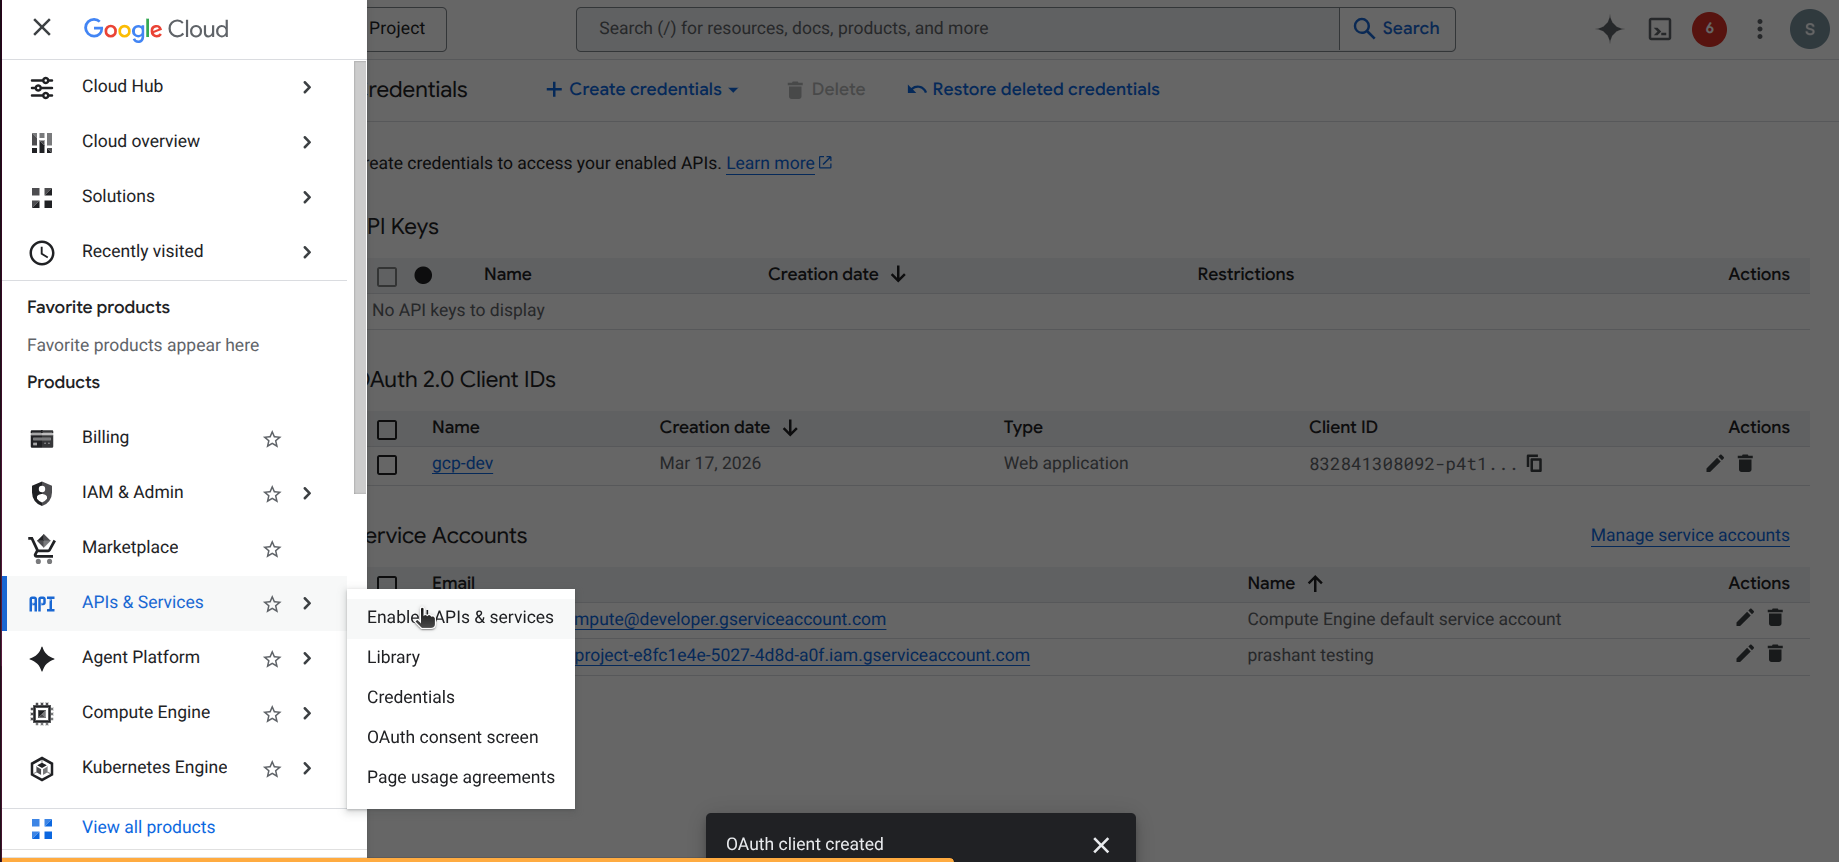
Click + Enable APIs and services.
Search for each service you want to monitor and click Enable.
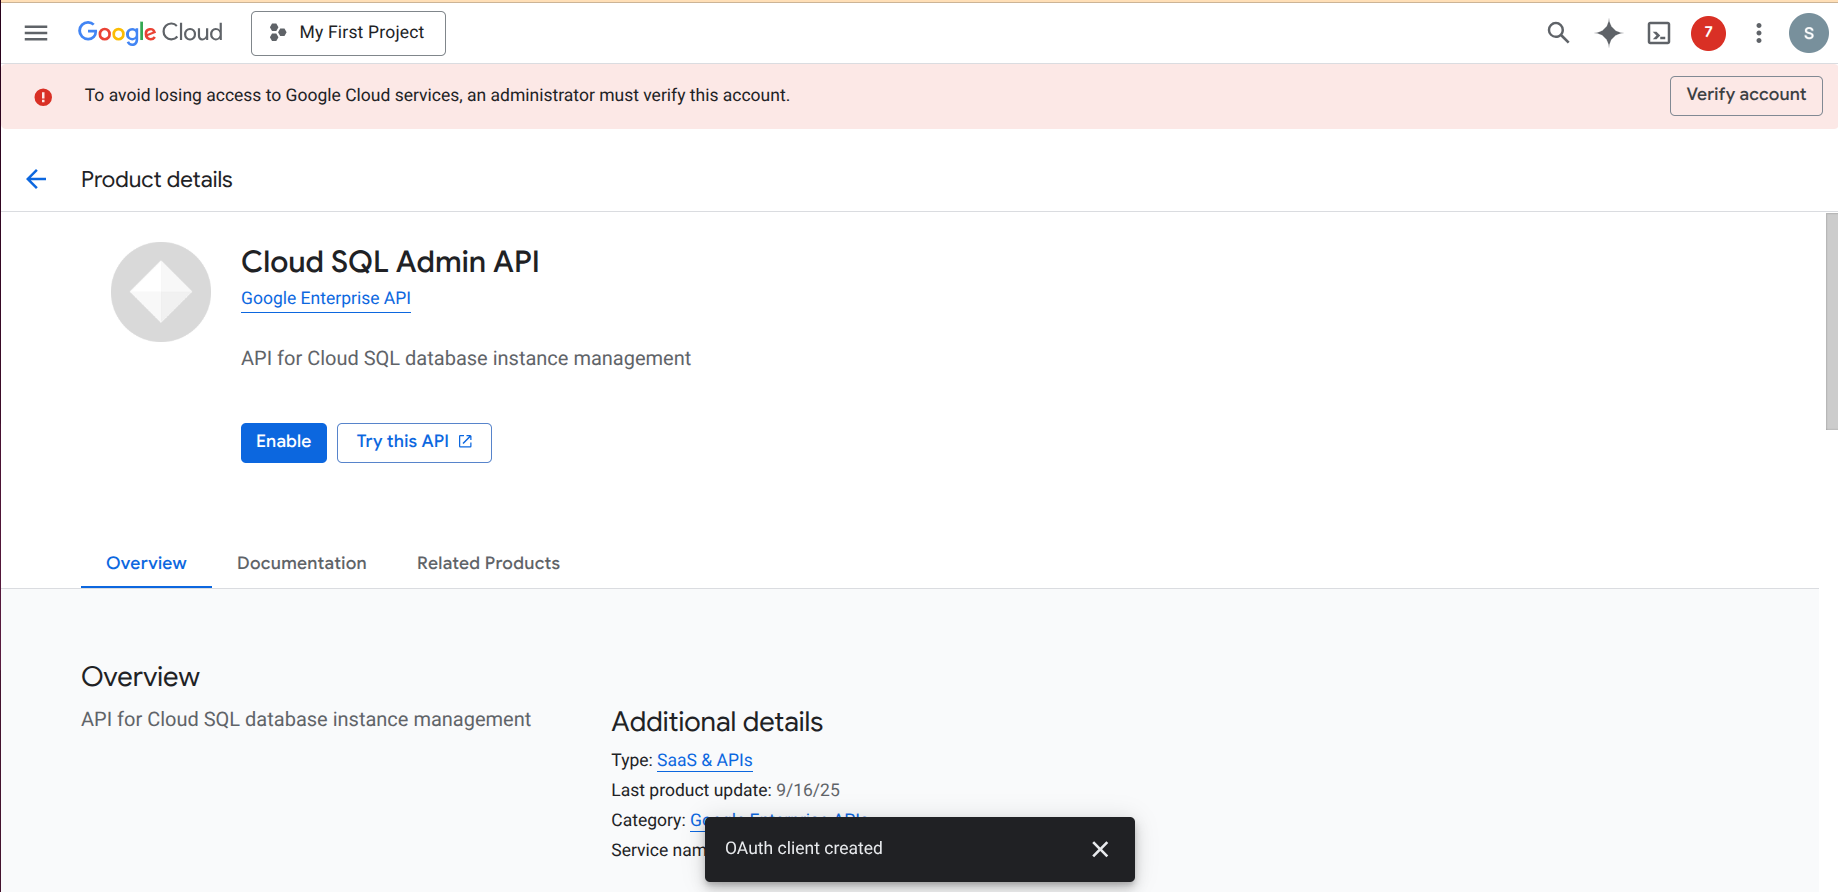
The following APIs are commonly required:
| API | Monitors |
|---|---|
| Cloud Monitoring API | GCP metrics and alerting |
| Compute Engine API | VM instances |
| Cloud Filestore API | Managed file storage |
| Cloud Resource Manager API | Project and resource hierarchy |
| Cloud Storage API | Object storage buckets |
- Repeat for each additional service you want ObserveOps to monitor.
Use the Client ID and Client Secret when creating a credential profile for Google Cloud in ObserveOps. Refer to Adding Cloud Devices for Monitoring to continue.